Everyone knows about enabling optimized charging, AssistiveTouch, and the ability to lock photos with Face ID on an iPhone. But do you know there are some hidden settings on your iPhone that you need to change right now?
These settings will make your life easier or protect your data when using your iPhone. So, grab your iPhone and start working ’em toggles.
1. Clearer Voice Calls
Apple introduced a new Voice Isolation mic mode on iOS 16 that reduces background noise on a call. While most people would assume this feature works best with FaceTime or other video calling apps, you would be (pleasantly) surprised to know it works well even with standard voice calls.


Once you place a call via the Phone app, drag down the Control Center and tap on Mic Mode. Then, choose Voice Isolation. Enabling this feature will surely improve the quality of calls whenever you’re in a noisy environment.
2. Make Your Photos and Videos More Compatible
By default, your iPhone stores photos in a compressed HEIC format. While this certainly helps save storage space, the file format isn’t compatible with several other devices, and it may also be a hassle to transfer HEIC files to a computer.
Hence, it’s best to change the format of your photos and videos to one that’s widely compatible. Thankfully, Apple lets you do this with a single tap. Here’s how.
Open the Settings app and navigate to the Camera section. Then, select Formats. Change it to Most Compatible.


Note: Only the photos and videos you capture after making the change will be in the most compatible format. The ones recorded prior will remain in HEIC.
3. Improve the Quality of Close-Up Photos
Ever since smartphone sensor sizes started getting bigger, brands have started automatically switching to the ultra-wide camera for close-up shots to avoid fringing. However, this results in lower-quality photos since the ultra-wide camera on the iPhone isn’t as sharp as the primary one.
If you feel that the close-up pictures of your pets, kids, or documents and objects aren’t looking great on your new iPhone, here’s how to stop your iPhone from automatically switching to the macro mode.
Step 1: Open the Settings app > navigate to the Camera section. Scroll to the bottom and enable the toggle for Macro Control.


Step 2: Scroll up and select Preserve Settings. Turn on the toggle for Macro Control.
Step 3: Now, open the Camera app and bring an object close to the camera. You’ll see a Macro toggle at the bottom-left corner. Tap on it to disable it.


If you wish to use the Macro mode manually, tap on the yellow toggle again to enable it. However, ensure to turn it off after use.
4. Stop Apps From Tracking Your Data
Newer versions of iOS allow you to control whether or not you want apps to track your activity on your iPhone. This is a big bonus since you can avoid targeted ads by stopping apps from accessing your data.
So, the next time you think Instagram started showing you ads for pet toys after you searched for them on Amazon, here’s how to stop that from happening.
Open the Settings app > navigate to Privacy & Security. Then, jump into Tracking and turn off the toggle for Allow Apps to Request to Track. Also, turn off the toggles for all apps.


While at it, go to the previous menu and head to Analytics & Improvements > disable the toggle for Share iPhone Analytics.


5. Hide Your Apps and Home Screens
This setting is surely going to take you by surprise! Apple has added the ability to hide a home screen from your iPhone, which is a great way to tuck away unnecessary apps you don’t use all the time. It’s a good way to hide some apps from your home screen before handing your phone to someone.
Once you get your phone back, enable the home screen(s) once again to access all its contents. Here’s how to do it.
Step 1: Tap and hold on your iPhone’s home screen until all the icons start jiggling. Then, tap on the dots at the bottom indicating which home screen you’re on.
Step 2: Uncheck the home screens you want to hide and tap on Done.


To restore the hidden home screens, repeat the process and tick the home screens you want to bring back.
These Settings even work on iPads, so if you have one, perform the steps on it as well.
Was this helpful?
Last updated on 21 May, 2024
Read Next
 How to Change iPhone’s Touch Sensitivity Settings
How to Change Your iPhone’s Touch Sensitivity Settings If your iPhone feels too sensitive or responsive, adjust the settings.
How to Change iPhone’s Touch Sensitivity Settings
How to Change Your iPhone’s Touch Sensitivity Settings If your iPhone feels too sensitive or responsive, adjust the settings.
 How to Change Mouse Sensitivity (DPI) and Other Settings in Windows 11
Method 1: Increase or Decrease Mouse Sensitivity Sensitivity in a mouse can be anything, from how fast it moves across the screen to how fast it reacts when double-clicking.
How to Change Mouse Sensitivity (DPI) and Other Settings in Windows 11
Method 1: Increase or Decrease Mouse Sensitivity Sensitivity in a mouse can be anything, from how fast it moves across the screen to how fast it reacts when double-clicking.
 2 Ways to Change SMS and iMessage Color and Font on iPhone or iPad
What Does the Standard Message Color Represent The message bubbles are available in three different colors.
2 Ways to Change SMS and iMessage Color and Font on iPhone or iPad
What Does the Standard Message Color Represent The message bubbles are available in three different colors.
 How to Change Font Style in Notes App on iPhone, iPad and Mac
Change Font Style in Notes App on iPhone and iPad Let's first show you how to change the font style of your notes in the Notes app on your iPhone
How to Change Font Style in Notes App on iPhone, iPad and Mac
Change Font Style in Notes App on iPhone and iPad Let's first show you how to change the font style of your notes in the Notes app on your iPhone
 How to Change Default Search Engine in Safari on iPhone, iPad, and Mac
The Safari browser is the default app to browse the web on Apple devices.
How to Change Default Search Engine in Safari on iPhone, iPad, and Mac
The Safari browser is the default app to browse the web on Apple devices.
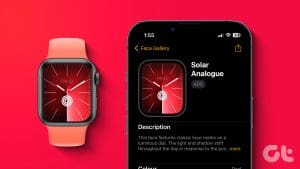 How to Change Apple Watch Face from iPhone or Watch
Traditional watches had the problem that you couldn't change their clock face.
How to Change Apple Watch Face from iPhone or Watch
Traditional watches had the problem that you couldn't change their clock face.
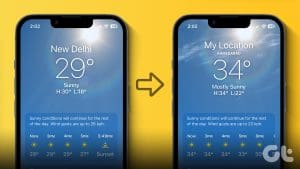 How to Change Weather Location on iPhone, iPad, or Apple Watch
If you own an iPhone or an Apple Watch, you probably know how convenient it is to check the weather forecast on these devices.
How to Change Weather Location on iPhone, iPad, or Apple Watch
If you own an iPhone or an Apple Watch, you probably know how convenient it is to check the weather forecast on these devices.
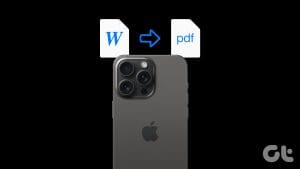 How to Change File Type (Extension) on iPhone
Whatever files you currently have on your iPhone, all have an extension attached to them.
How to Change File Type (Extension) on iPhone
Whatever files you currently have on your iPhone, all have an extension attached to them.
The article above may contain affiliate links which help support Guiding Tech. The content remains unbiased and authentic and will never affect our editorial integrity.