Grouping elements in any photo-editing tool comes in handy when you want to accomplish a task on multiple objects together. For instance, you can move them together, resize them, duplicate them, and more. In case you are wondering how to do it in the Canva mobile apps and website, we will help you with the same here.
Canva is a beautiful tool to create posters, graphics, wallpapers, social media posts, etc. We have covered the steps for the web version of Canva and mobile apps (Android and iPhone). You can use it to group text, elements, and other objects.
Let’s see how to group and ungroup elements in Canva on the web (Windows, Mac), Android, and iPhone.
How to Group and Ungroup Elements in Canva on PC
There are three methods to group items on the web version of Canva. Let’s check each one-by-one.
Method 1: Group Elements Temporarily Using Mouse
In case you want to act on multiple elements only once, you can group them temporarily. To do so, drag your cursor and select the objects that you want to group. You will notice the selection border will appear around the selected objects. Now perform the required activities such as resize, delete, move, etc., on them.
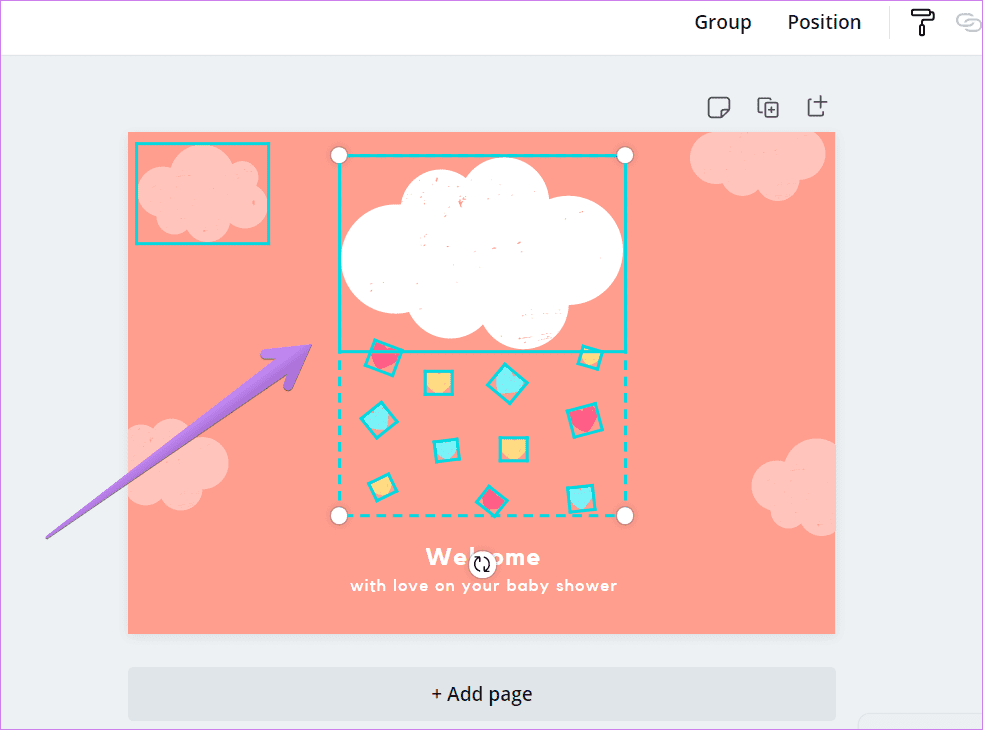
This is one of the easiest ways to group objects in Canva. However, the drawback of this method is that all the objects in the selected range (usually a square or a rectangle) will get selected.
To ungroup objects that are selected using this method, click anywhere outside of the selected boxes. The selection boxes will disappear, and the objects will work individually.
Method 2: Group Elements Temporarily Using Keyboard Shortcut
In this method, you will be grouping elements located at any place on your canvas with the help of keyboard shortcuts. First, click on any one of the objects that you want to select. Then press the Shift key on your keyboard and click on other elements that you want to select.
Note: Keep the Shift key pressed while selecting other items.

This method gives you a free will to select and choose items even if those fall in the selected range if picked using a mouse. As you can see in the above screenshot, only the three clouds are selected and not the hearts.
To ungroup any object, click the mouse button while pressing the Shift key on the keyboard. That will deselect the element.
Pro Tip: You can use keyboard shortcuts to add or remove objects from the group if selected using the first method.
Method 3: Group and Ungroup Elements Permanently
In the above two methods, you will lose the group as soon as you click anywhere outside the selection. To keep the selected items intact no matter what you do, you have the Group feature in Canva.
For that, first, select the required objects using either method 1 or 2. That is, drag the mouse or select items with the help of the Shift key. Once selected, click on the Group button at the top-right corner. Alternatively, use the Ctrl + G (Windows) or Command + G (macOS) keyboard shortcut to group elements once the items are selected.
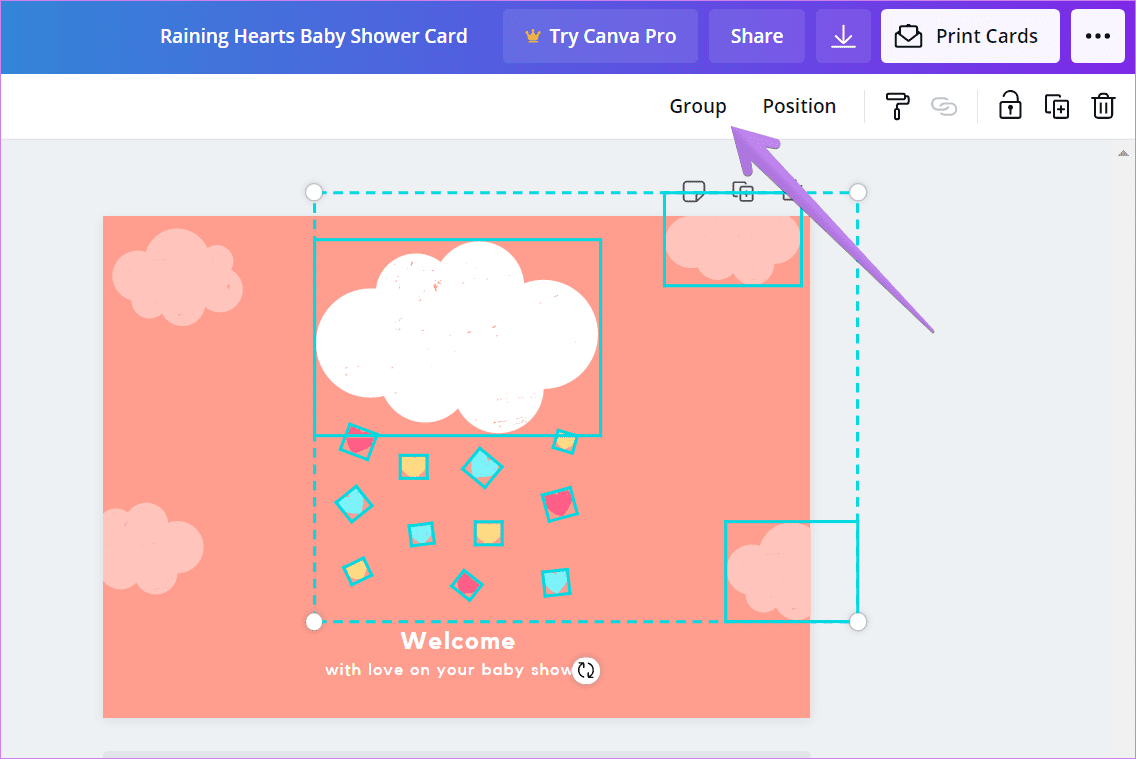
If you click or perform an action on one object, the same will happen for other grouped elements.
To ungroup elements, click on one of the grouped elements. Then hit the Ungroup button at the top. You can also take the help of keyboard shortcuts. Use Ctrl + Shift + G (Windows) and Command + Shift + G (Mac) keyboard shortcut to ungroup elements permanently.
Tip: Find out how to crop pictures into shapes in Canva on mobile and PC.
How to Group and Ungroup Elements in Canva on Android and iPhone
To group elements on the Canva Android and iPhone app, touch and hold the first element you want to group until you see the one element selected message. Now tap on other elements that you want to select. Hit the Done button in the pop-up message box.
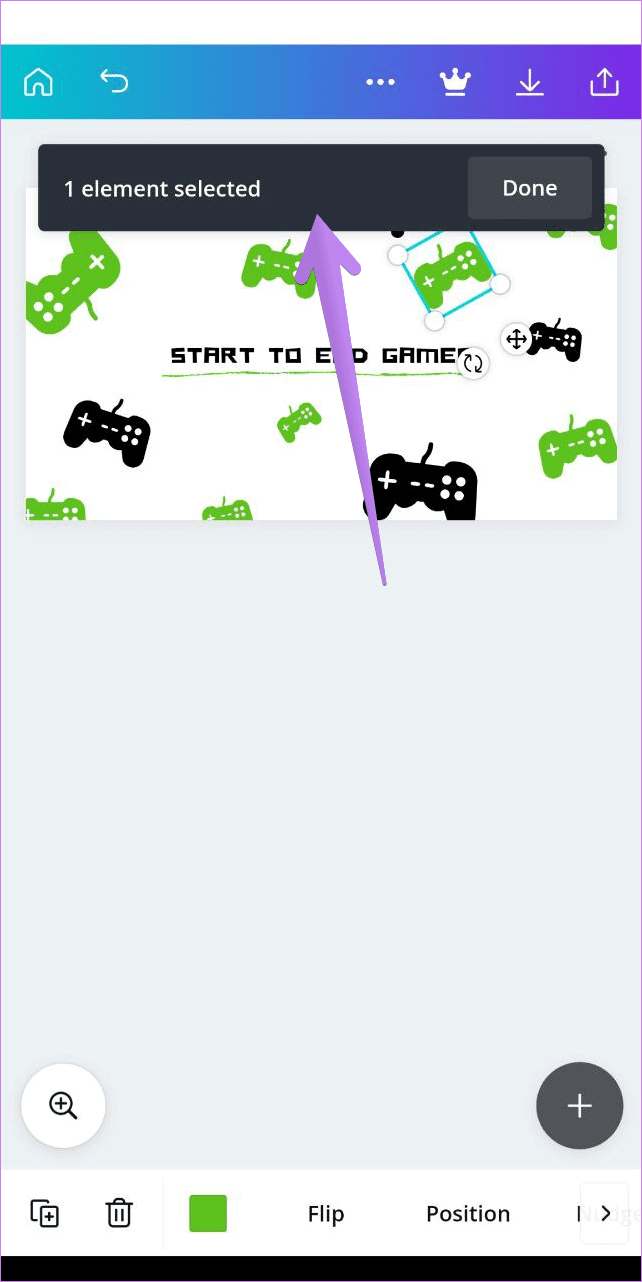
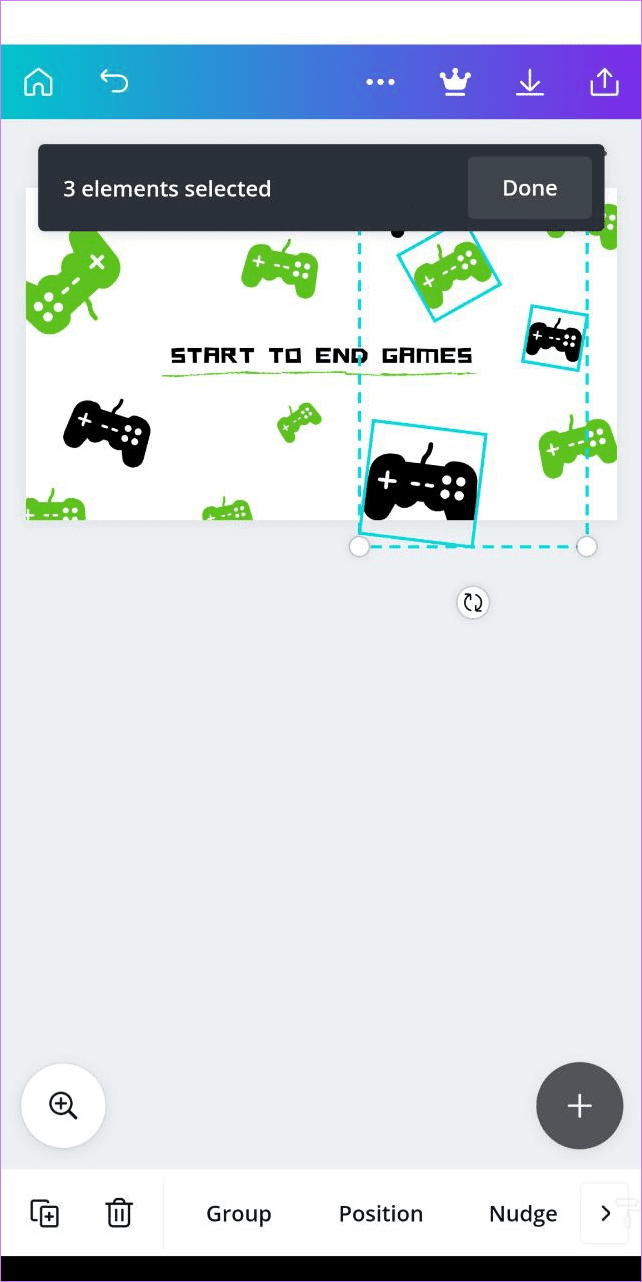
At this stage, your items are grouped temporarily. You can perform the required action on them as a group. Tap outside the selection box to ungroup or deselect multiple items.
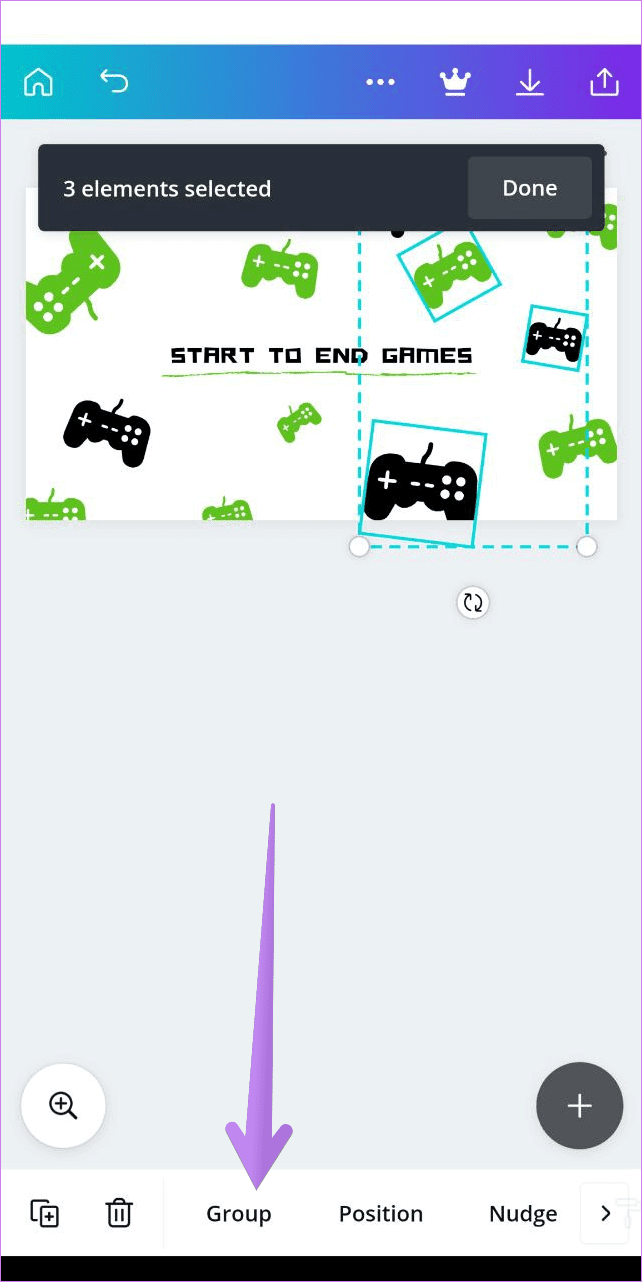
If you want to group the elements permanently, i.e., for further tasks, tap on the Group button at the bottom after selecting them, as shown above. To ungroup, tap somewhere where all the items are grouped. Then hit the Ungroup button.

Tip: Check out our guide on how to use the Canva app on Android.
Canva for Instagram
You already know that you can use Canva for creating Instagram posts and stories. But are you familiar with the fact that you can create Instagram highlight covers in Canva? And if Canva doesn’t suffice your Instagram needs, you can always try the alternatives of Canva.
Was this helpful?
Last updated on 13 July, 2021
The article above may contain affiliate links which help support Guiding Tech. The content remains unbiased and authentic and will never affect our editorial integrity.


