Fix 1: Enable and Update the Graphics Driver
You may see error code 22 on Windows if you have previously disabled the graphics driver or if it’s outdated. Here’s how to fix that.
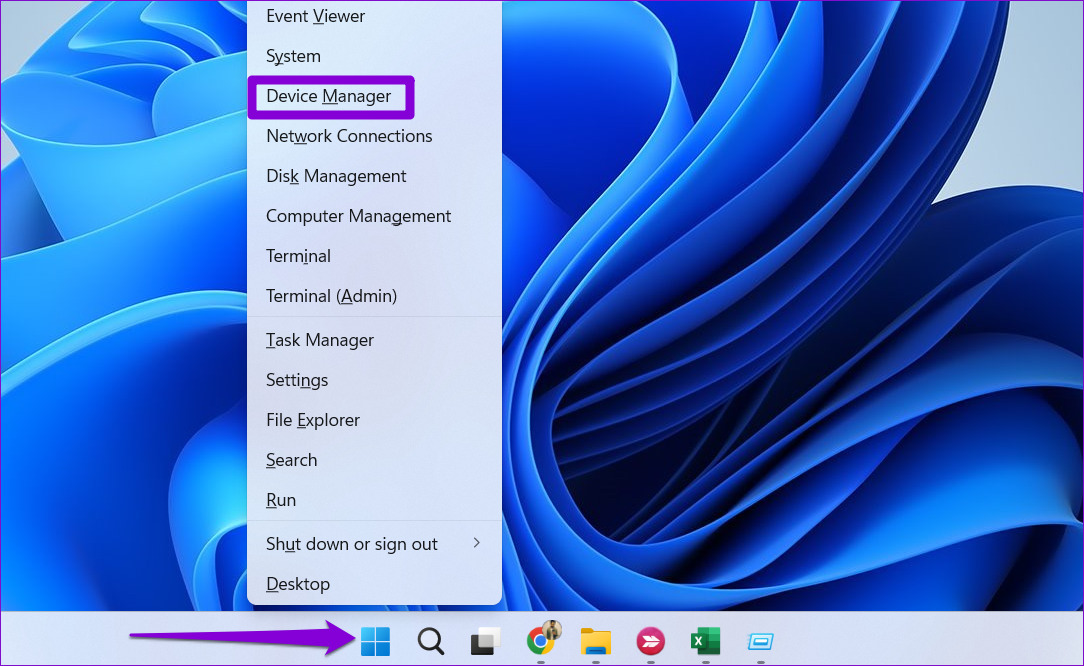
Step 1: Right-click on the Start icon and select Device Manager from the list.
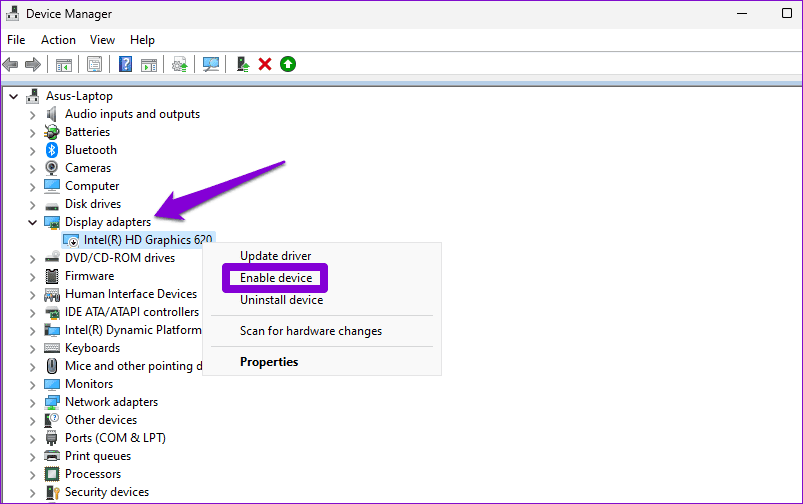
Step 2: Click the tiny arrow on the left of the Display adapters to expand it. Then, right-click on your graphics driver and select Enable device.
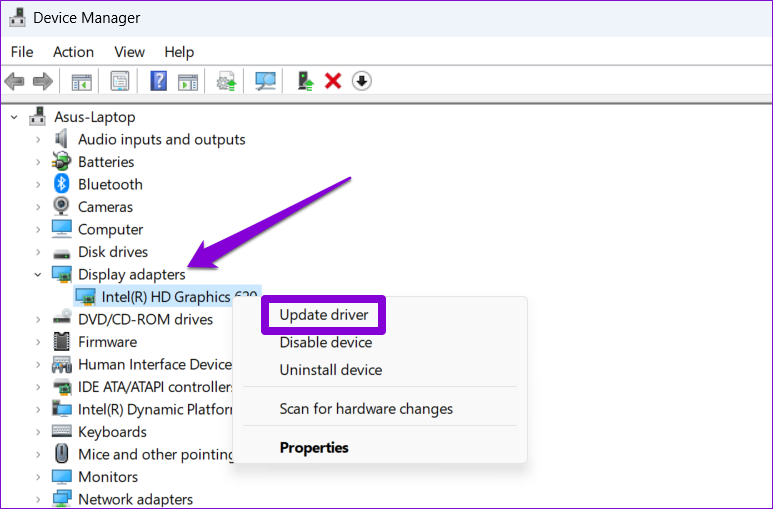
Step 3: Right-click on the driver again and select Update driver.
Follow the on-screen prompts to finish updating the driver and see if that resolves the error.
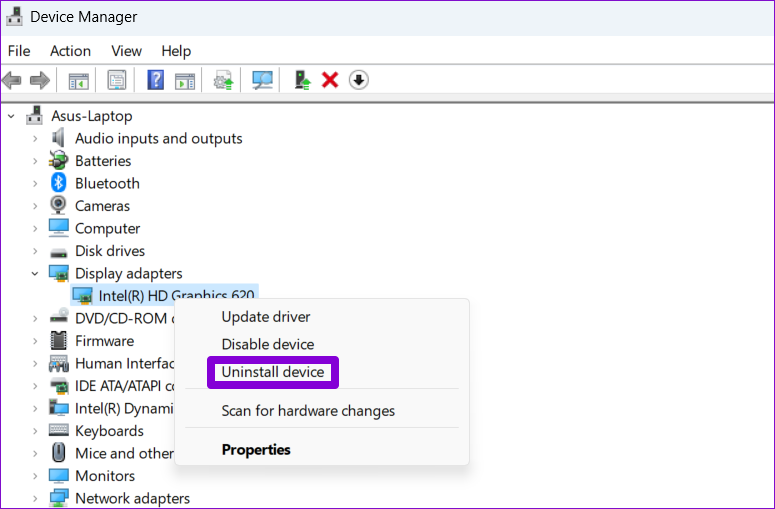
Fix 2: Reinstall the Device Driver
If updating the driver proves ineffective, it’s likely that the driver is corrupted or damaged. In that case, you must uninstall the driver and install it again.
Step 1: Press the Windows key + R to open the Run dialog box. Type devmgmt.msc in the box and press Enter.
Step 2: Expand Display adapters, right-click on your graphics driver, and select Uninstall device.
Step 3: Select Uninstall to confirm.
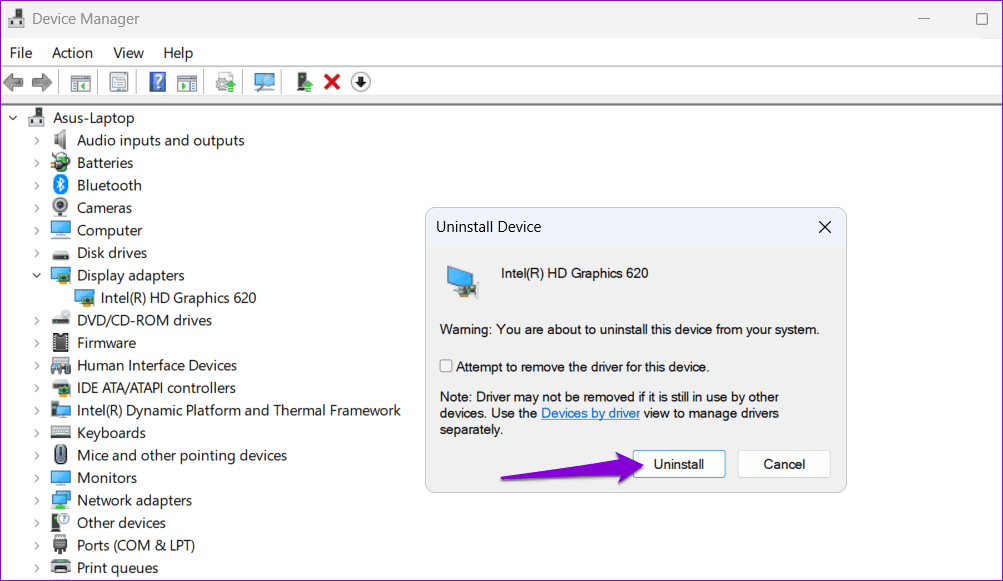
After completing the above steps, visit Intel, NVIDIA, or AMD’s website to download the latest compatible display driver and install it.
Fix 3: Reset BIOS
BIOS (or Basic Input Output System) is the software responsible for booting up your system correctly. If there is a problem with the current BIOS settings, Windows may have trouble communicating with the graphics driver, resulting in error code 22. You can try resetting the BIOS settings to see if that fixes the error.
Step 1: Press the Windows key + S to open the search menu. Type recovery options in the box and press Enter.

Step 2: Click the Restart now button next to Advanced startup.
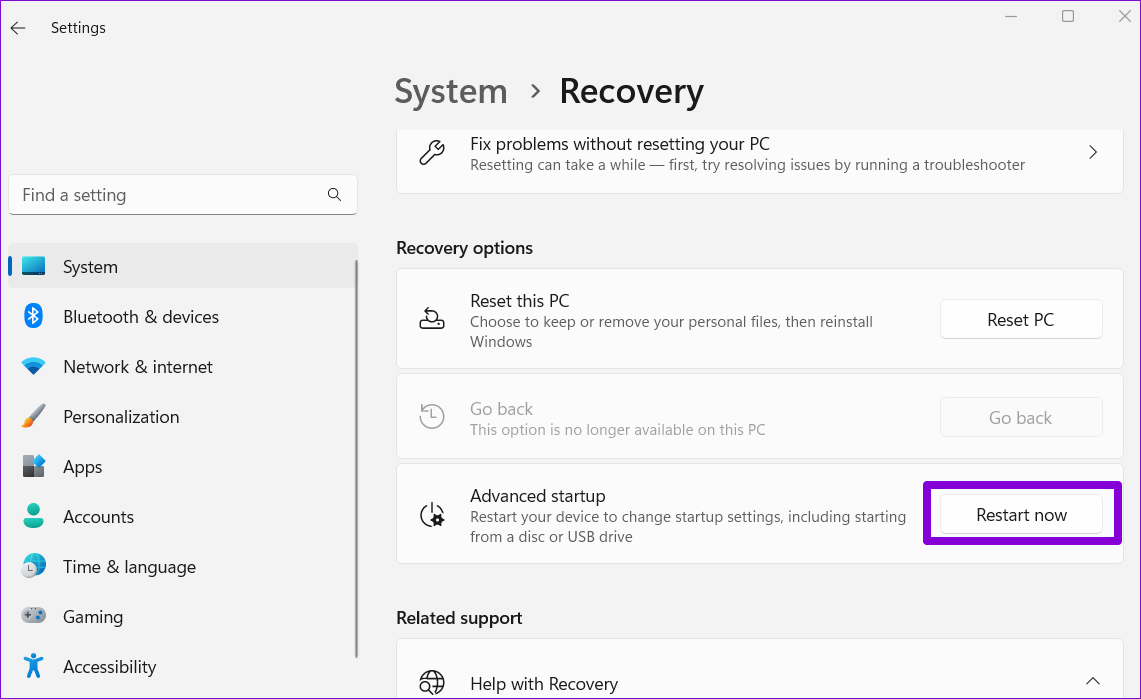
Step 3: Click on Restart now to confirm.
Step 4: Wait for your PC to reboot. Then, go to Troubleshoot > Advanced options > UEFI Firmware Settings.

Step 5: Once in BIOS, press F9 to access the Setup Defaults option. Then, select Yes to confirm.
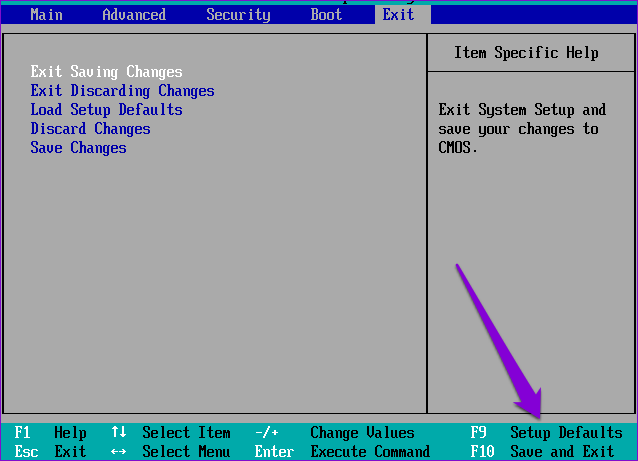
Step 6: Press F10 to save changes and exit BIOS.
Restart your PC after this and see if the error still appears.
Fix 4: Perform a System Restore
System restore is a handy feature to reverse any bad changes made to your PC. If none of the above tips help, consider performing a system restore as a last resort.
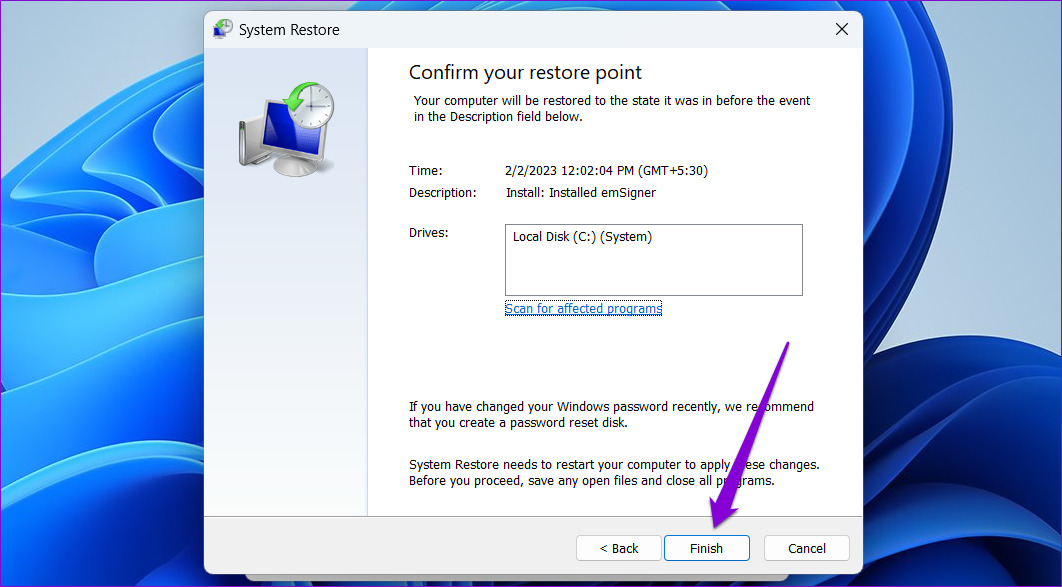
Step 1: Click the search icon on the taskbar, type create a restore point, and press Enter.

Step 2: Under the System Protection tab, click the System Restore button.

Step 3: Select Recommended restore and click Next to continue.

Step 4: Click Finish to proceed.
Was this helpful?
Last updated on 22 April, 2024
Read Next
 5 Ways to Fix “A Driver Cannot Load on This Device” Error on Windows 11
Fix 1: Update the Problematic Driver If a driver is incompatible, Windows may fail to load it.
5 Ways to Fix “A Driver Cannot Load on This Device” Error on Windows 11
Fix 1: Update the Problematic Driver If a driver is incompatible, Windows may fail to load it.
 5 Ways to Fix Printer Driver Is Unavailable Error on Windows 11
Fix 1: Run the Printer Troubleshooter Windows 11 includes several troubleshooters that can help you fix common system-level issues.
5 Ways to Fix Printer Driver Is Unavailable Error on Windows 11
Fix 1: Run the Printer Troubleshooter Windows 11 includes several troubleshooters that can help you fix common system-level issues.
 4 Ways to Fix “Windows Could Not Find a Driver for Your Network Adapter” Error
Fix 1: Enable Network Adapter Windows may fail to communicate with the network adapter if you've previously disabled it.
4 Ways to Fix “Windows Could Not Find a Driver for Your Network Adapter” Error
Fix 1: Enable Network Adapter Windows may fail to communicate with the network adapter if you've previously disabled it.
 Top 10 Ways to Fix ‘Display Driver Failed to Start’ Error in Windows 10 and 11
Display drivers facilitate communication between the Windows operating system (or any OS) with your GPU.
Top 10 Ways to Fix ‘Display Driver Failed to Start’ Error in Windows 10 and 11
Display drivers facilitate communication between the Windows operating system (or any OS) with your GPU.
 5 Ways to Fix Intel Graphics Control Panel Not Showing After Windows 11 Update
Common Fixes Check the Windows 11 context menu: Right-click the blank space on your desktop and select Show more options.
5 Ways to Fix Intel Graphics Control Panel Not Showing After Windows 11 Update
Common Fixes Check the Windows 11 context menu: Right-click the blank space on your desktop and select Show more options.
 What Happens When You Uninstall Graphics Drivers on Windows
Consequence of Uninstalling Graphics Drivers on Windows Uninstalling graphics drivers can result in washed-out colors and incorrect resolution if the system relies on native graphics drivers.
What Happens When You Uninstall Graphics Drivers on Windows
Consequence of Uninstalling Graphics Drivers on Windows Uninstalling graphics drivers can result in washed-out colors and incorrect resolution if the system relies on native graphics drivers.
 4 Ways to Fix the Login Error Code E84 in Steam for Windows
Switch to a different network connection: A slow or intermittent internet connection can also cause login errors in Steam.
4 Ways to Fix the Login Error Code E84 in Steam for Windows
Switch to a different network connection: A slow or intermittent internet connection can also cause login errors in Steam.
 4 Ways to Fix Error Code 0x80070570 in Windows
Fix 1: Re-Download Windows ISO Finding the correct Windows ISO for your PC is crucial for proper installation.
4 Ways to Fix Error Code 0x80070570 in Windows
Fix 1: Re-Download Windows ISO Finding the correct Windows ISO for your PC is crucial for proper installation.
The article above may contain affiliate links which help support Guiding Tech. The content remains unbiased and authentic and will never affect our editorial integrity.