We organize our notes, documents, files, and similar things on our phones. But the same thought of organizing contacts rarely crosses our minds. If you are from the few people who want to group and organize contacts, Samsung phones offer an amazing experience. Grouping contacts makes it easy to contact a specific set of people. Let’s see how to create and manage contact groups on Samsung phones.
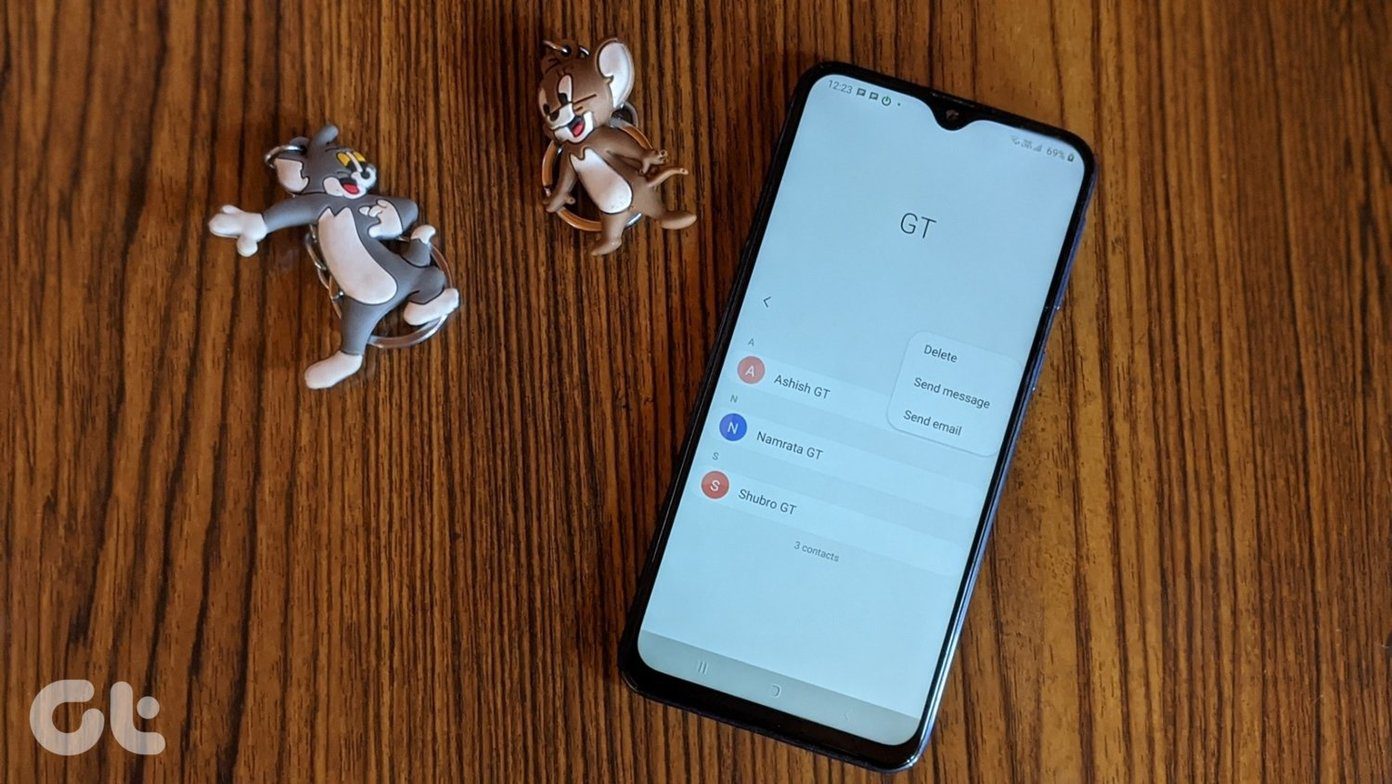
You can group your contacts so that you can send a group text or email and assign a common ringtone to all the group members. For instance, I have a separate ringtone for my Family group. Whenever a family member calls, I know it’s someone from the family and not a spam call without looking at my phone.
Excited about how to use groups in the Samsung Contacts and Phone app? Let’s find the answer.
Where to Find Groups for Contacts on Samsung Phones
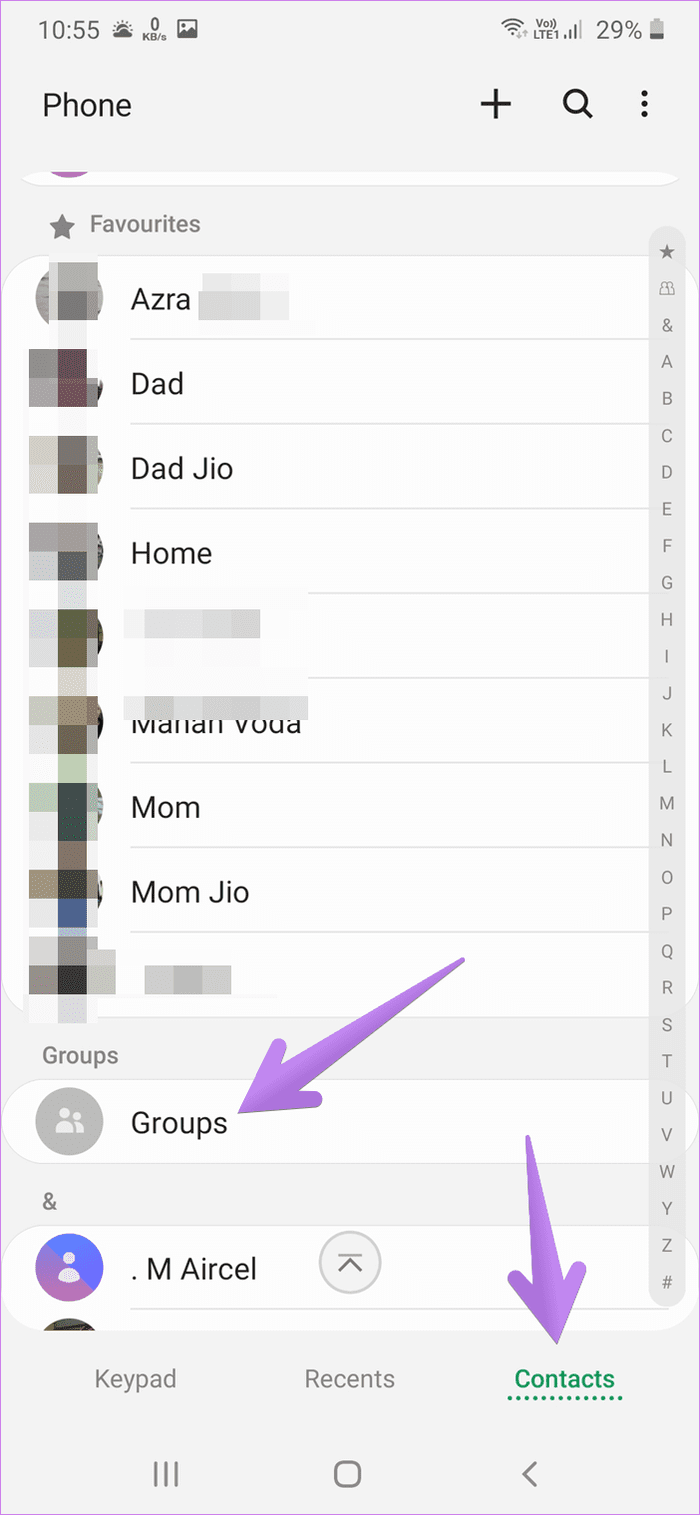
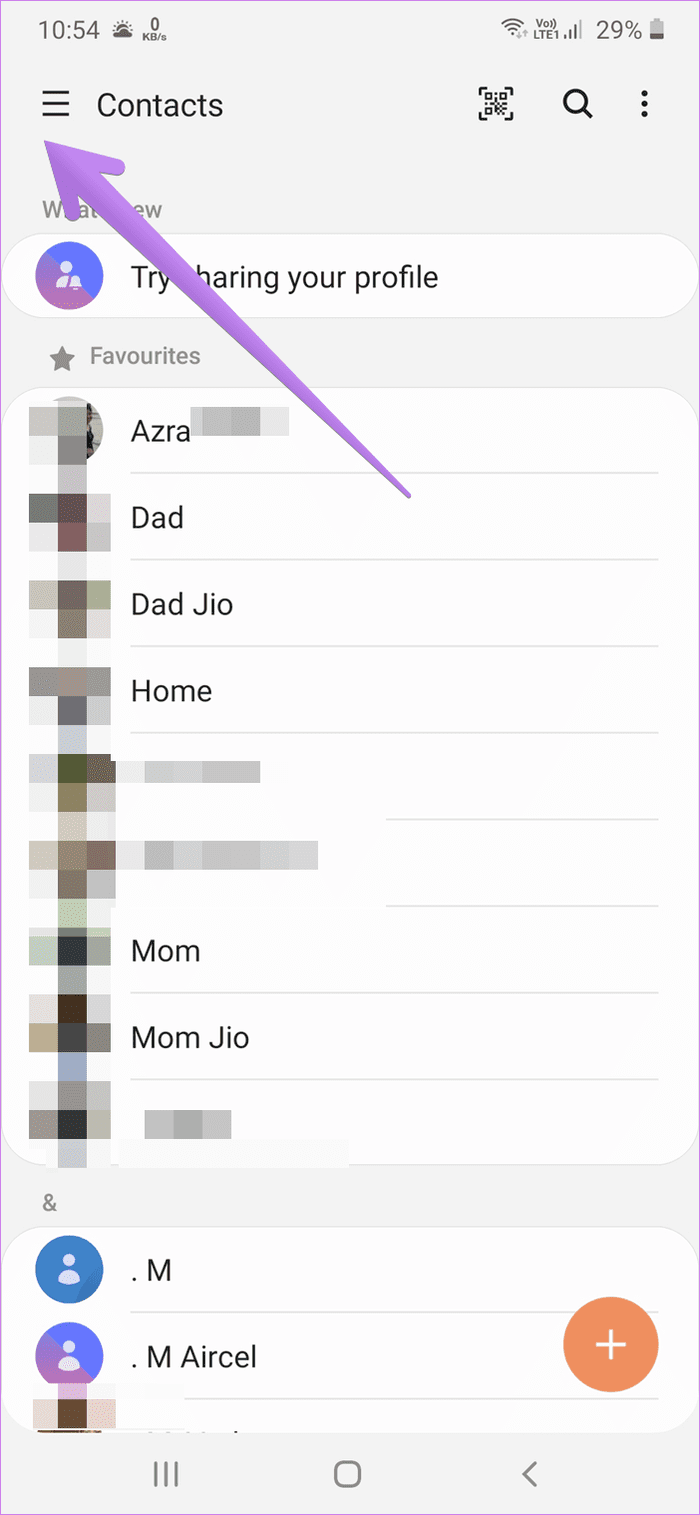
You will find the contact groups feature inside the Samsung Contacts, and Phone app. Open the Samsung Phone app and tap on the Contacts tab at the bottom. Scroll down a bit and you will have Groups. Tap on it to view, create, and edit groups.
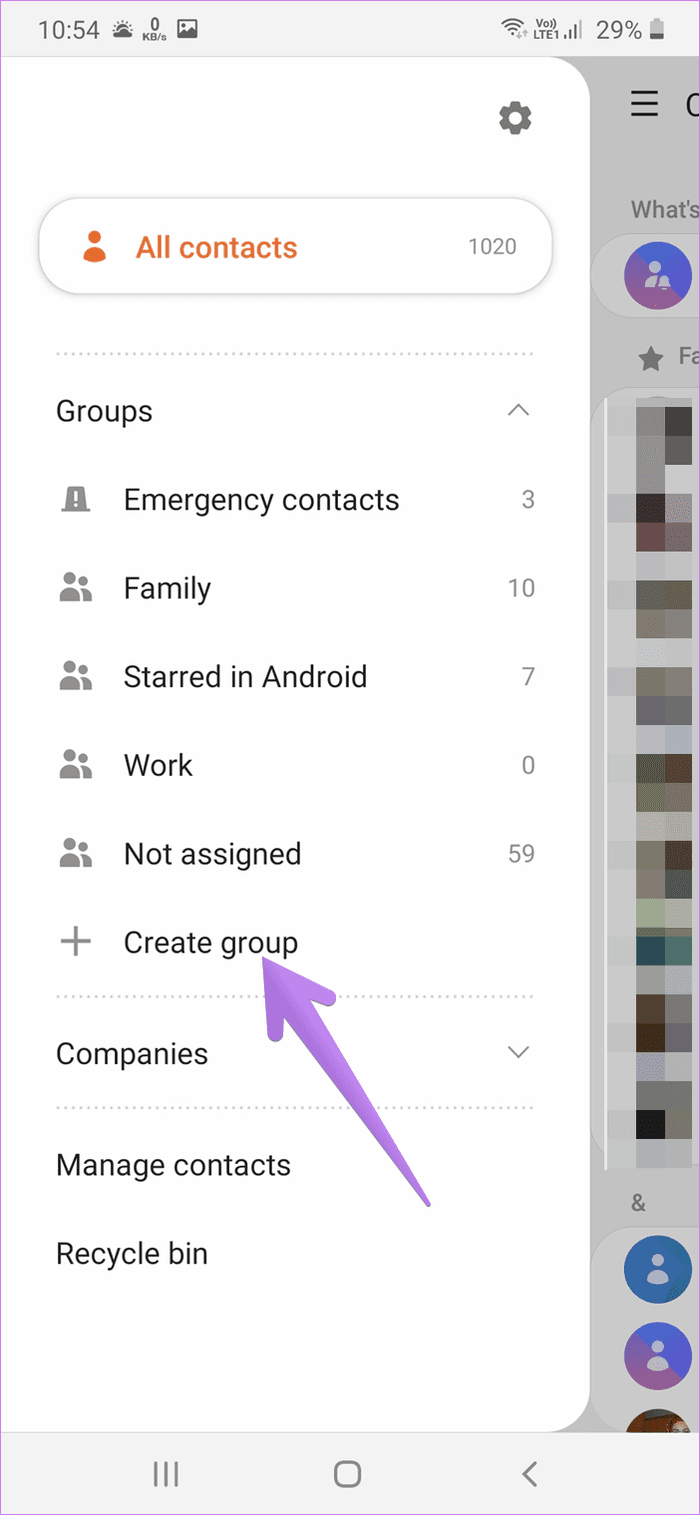
Alternatively, open the Contacts app. Tap on the three-bar icon. Expand Groups to reveal existing groups and to create a group.

Pro Tip: Find out how Google Phone and Samsung Phone apps differ from one another.
How to Create New Contact Groups
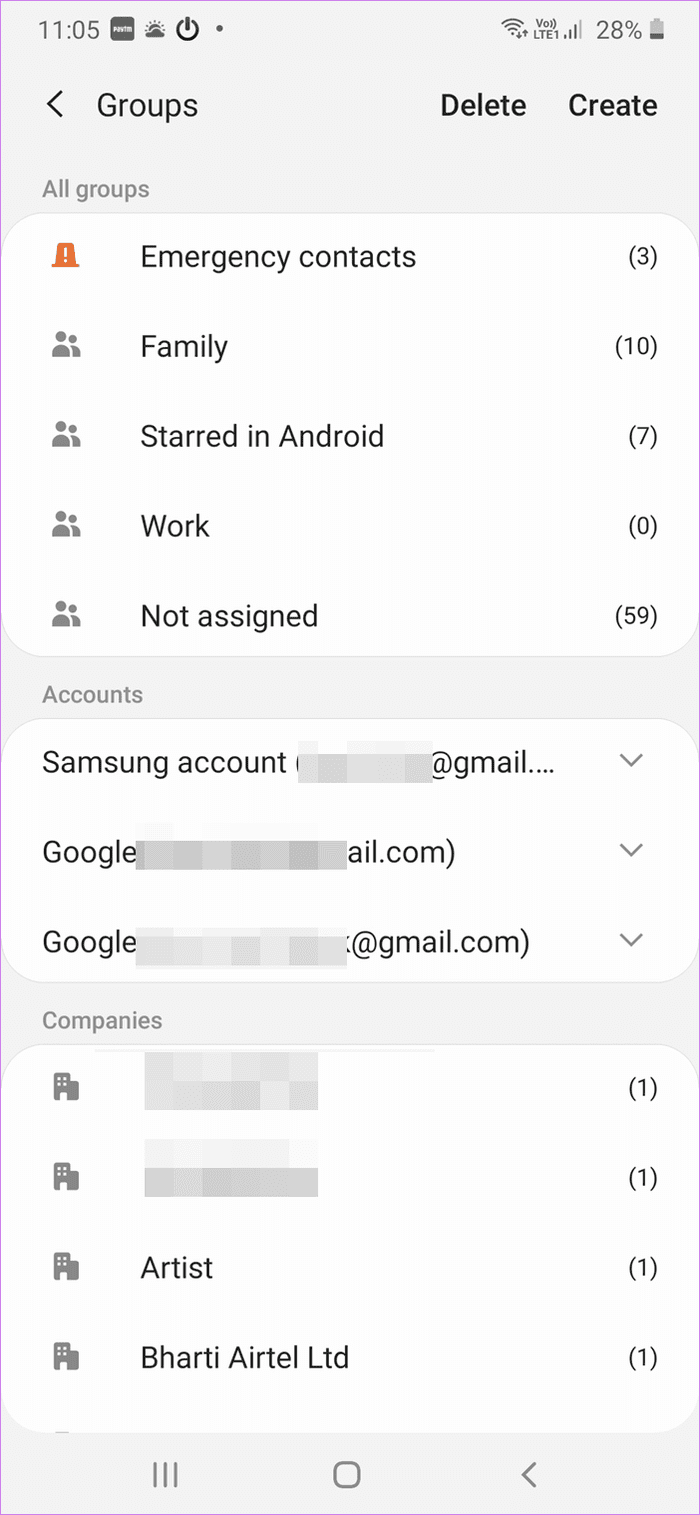
Samsung offers a few predefined groups that cannot be deleted or renamed. Those include Family, Emergency contacts, Starred in Android, and Not assigned. You can add contacts in those groups if the name seems suitable or create your own.
There are two ways to create a group. You can either do it from the Contacts app or Phone app. In the Phone app, go to the Contacts tab and tap on Groups, as shown in the above section. Tap on the Create button at the top to create a new group.


Assign a group name in the available box. Choose a ringtone if you want to set a ringtone for the group. You can edit it later. Tap on Add member and choose the contacts whom you want to add in the particular group. Tap on the Save button.
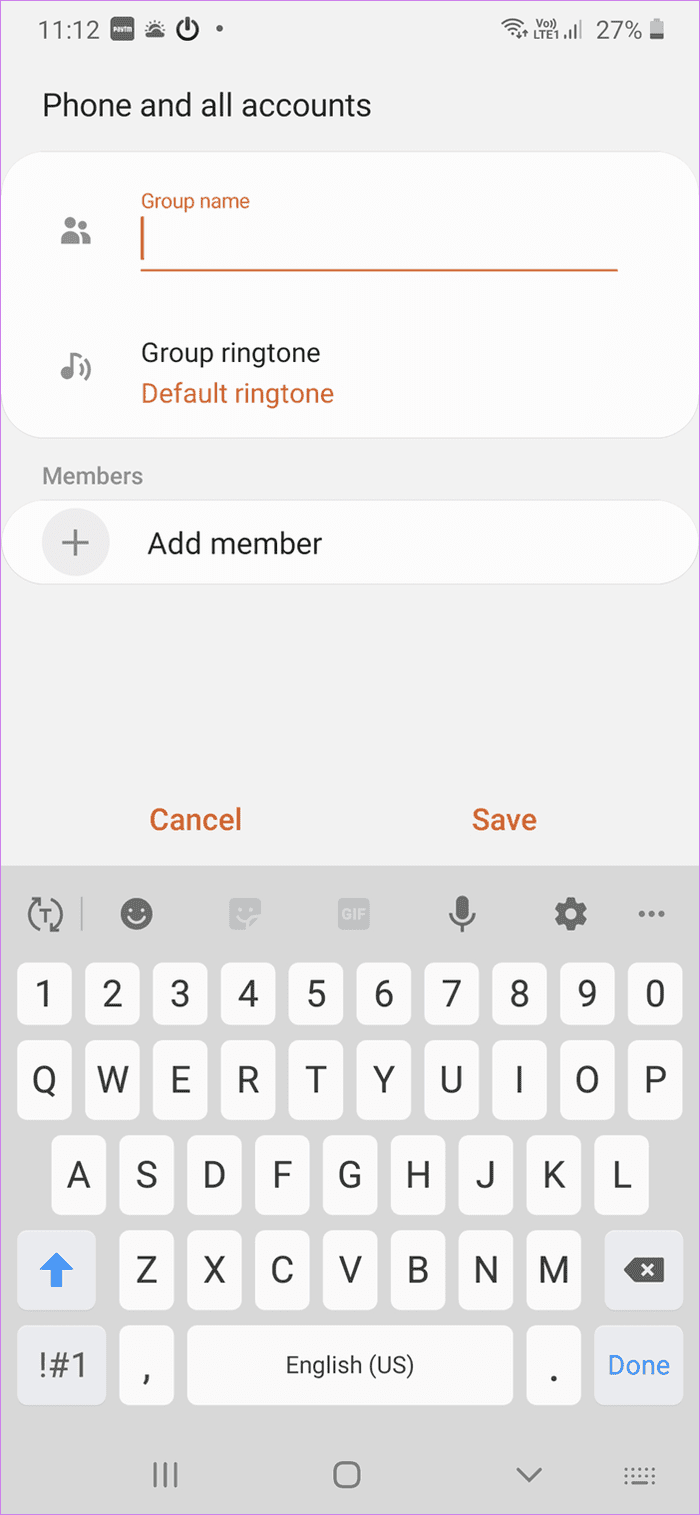
Alternatively, open the Contacts app and tap on the three-bar icon. Tap on Create group under Groups. Add a group name and add contacts using the Add member option.

How to Add or Remove Members From Contact Groups
There are three ways to do it. Firstly, you can add members while you are creating a group, as shown above. Other than that, here are two more methods.
Method 1: By Editing Group
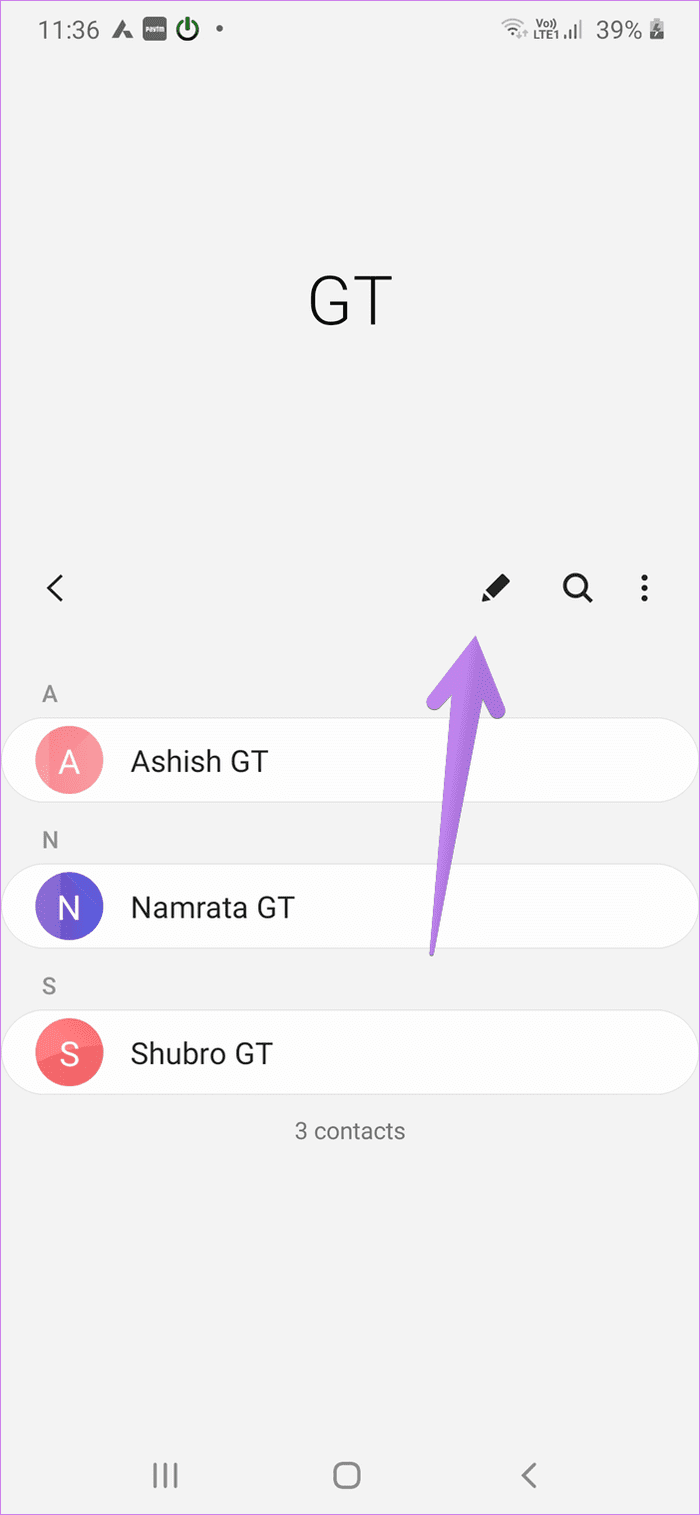
Members can be added or removed when you edit a group. For that, open the group either from the Contacts or Phone app, as shown in Where to find groups section. Tap on the group that you want to edit. Tap on the Edit icon in the group. Hit Add member option to add a contact. To remove a member, tap on the red remove (-) icon next to the member. Tap on Save to store the changes.
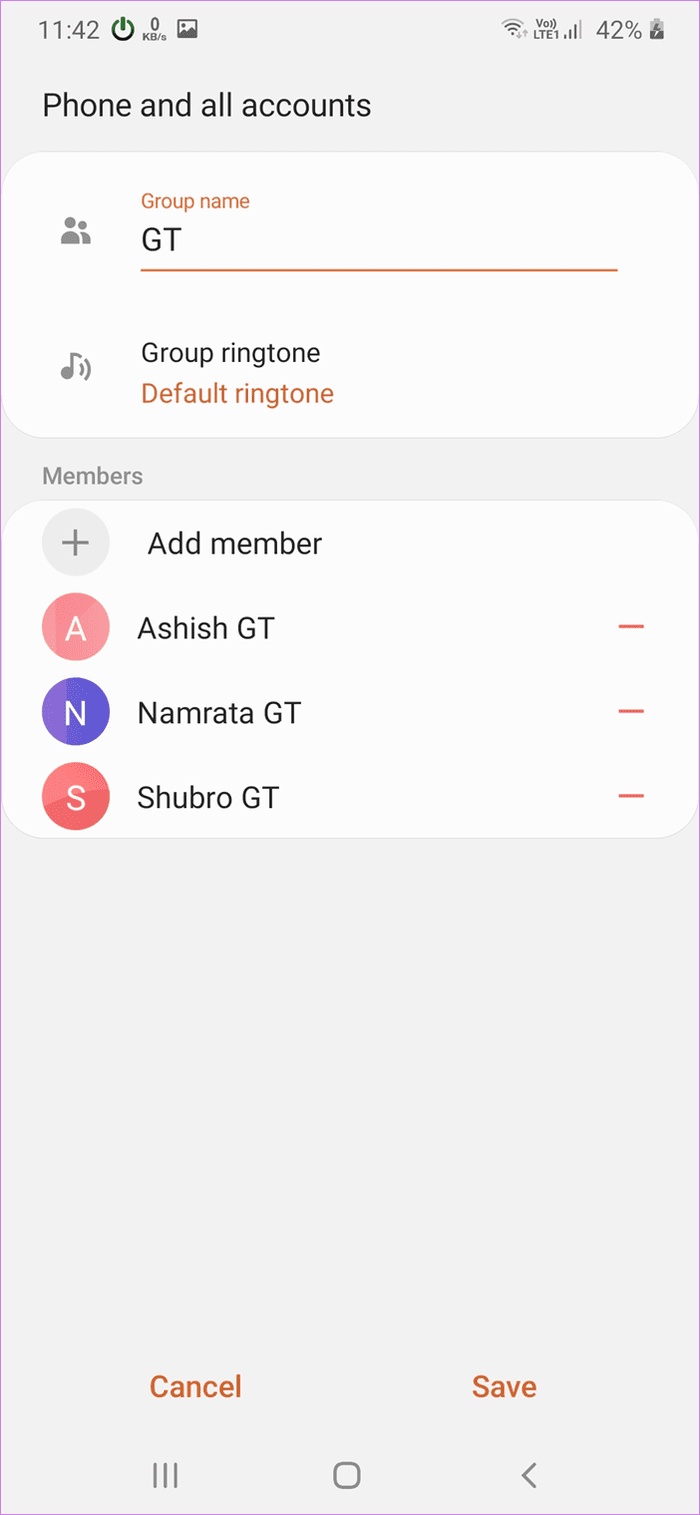
Pro Tip: To add the same contact to multiple groups, open the groups, and add it as a member.
Method 2: From Individual Contacts
You can assign a group to contact while editing individual contacts. For that, open any contact from the Contacts or Phone app you want to add to a group. Tap on the Edit button.

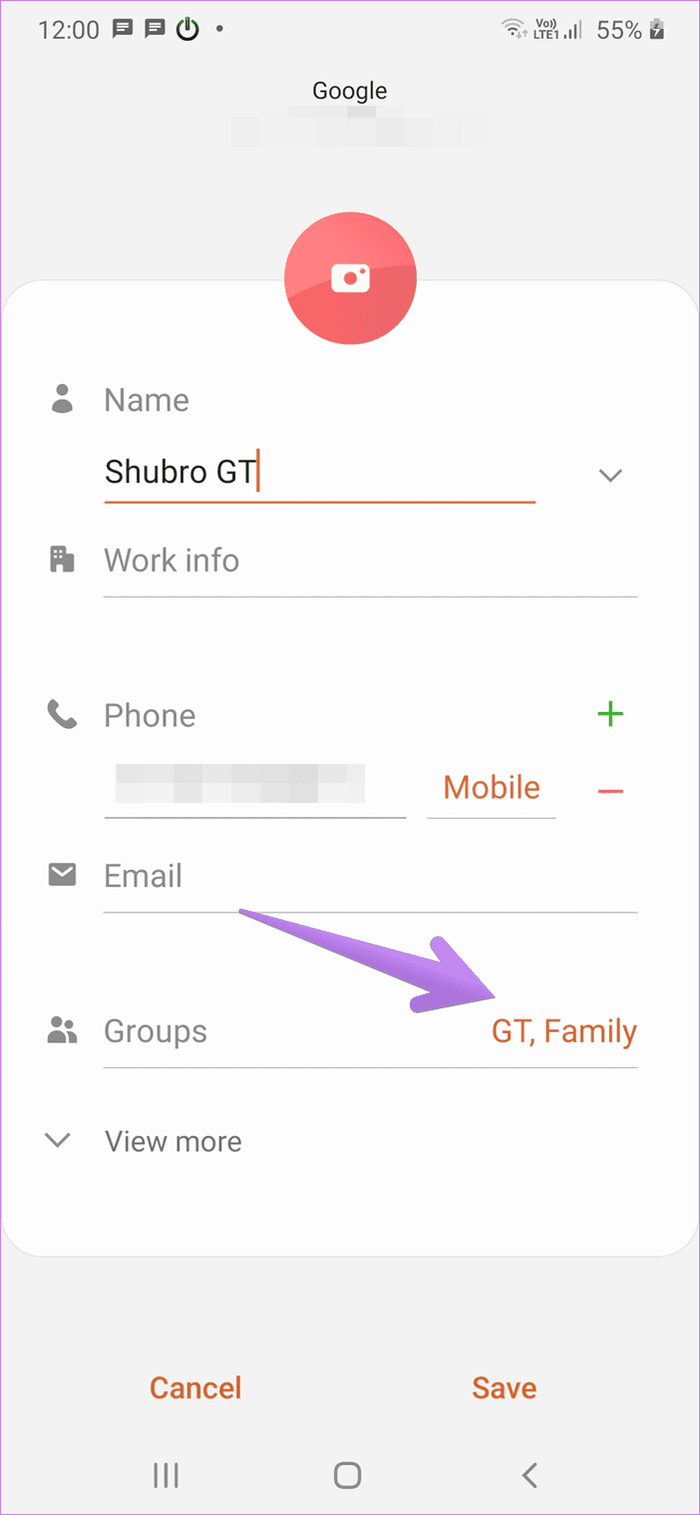
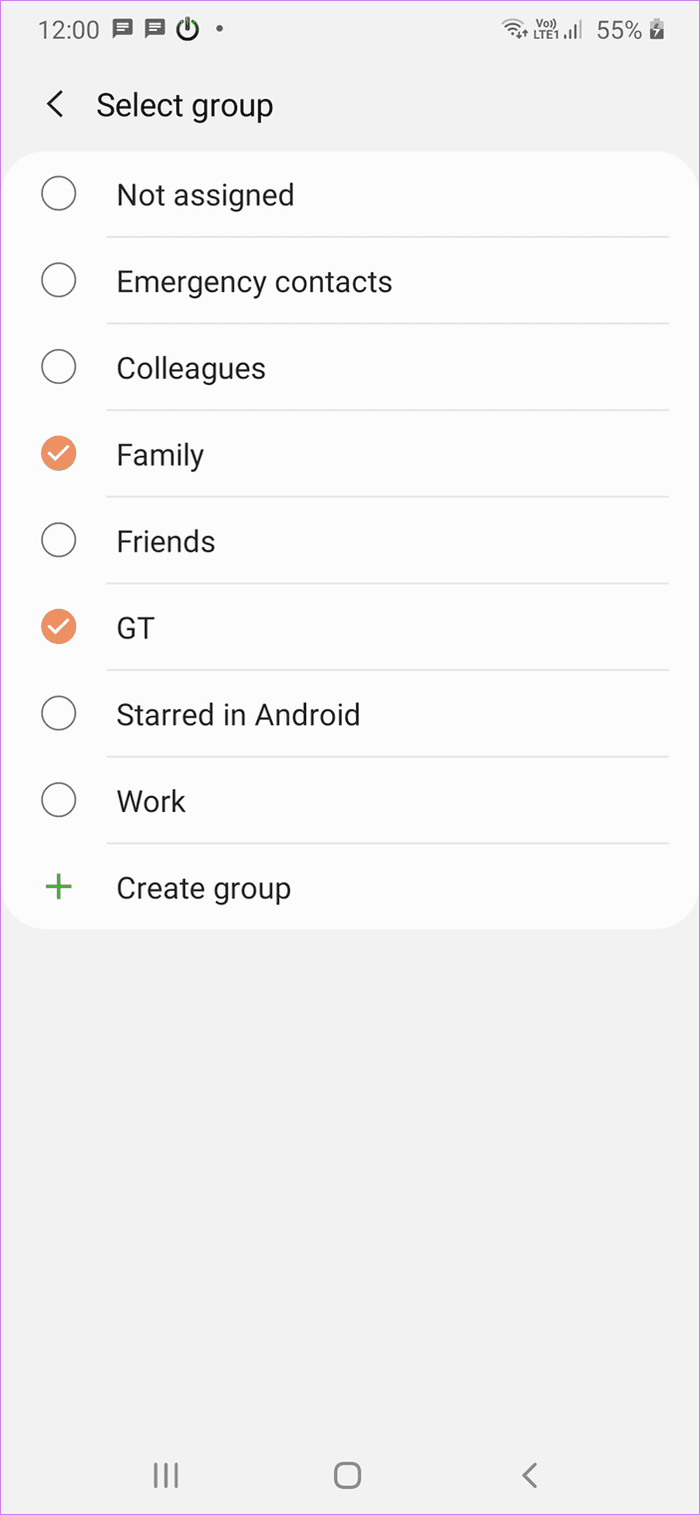
The contact edit screen will open. Look for the Groups option. Tap on it and choose an existing group. Go back and Hit Save.
Pro Tip: You can add a contact to multiple groups. For that, check the boxes next to multiple groups.
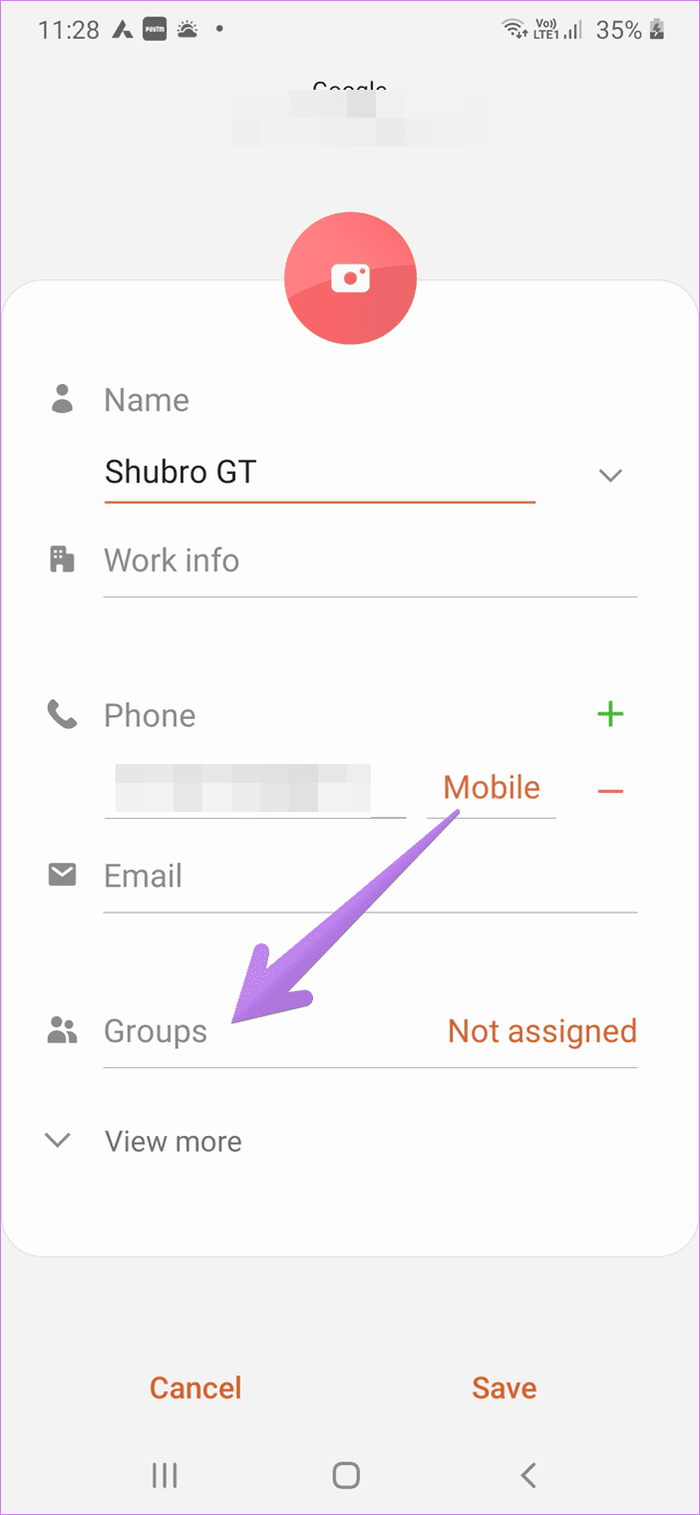

Pro Tip: If a group of your choice doesn’t exist, you can create a new group from an individual contact as well, as can be seen from the above screenshot.
Similarly, if you have assigned a group to a contact and want to remove that, open the contact. Tap on the Edit icon.

Tap on Groups and uncheck the groups that you don’t want to be associated with the contact. Tap on Save on the previous screen.
How to Check Assigned Groups
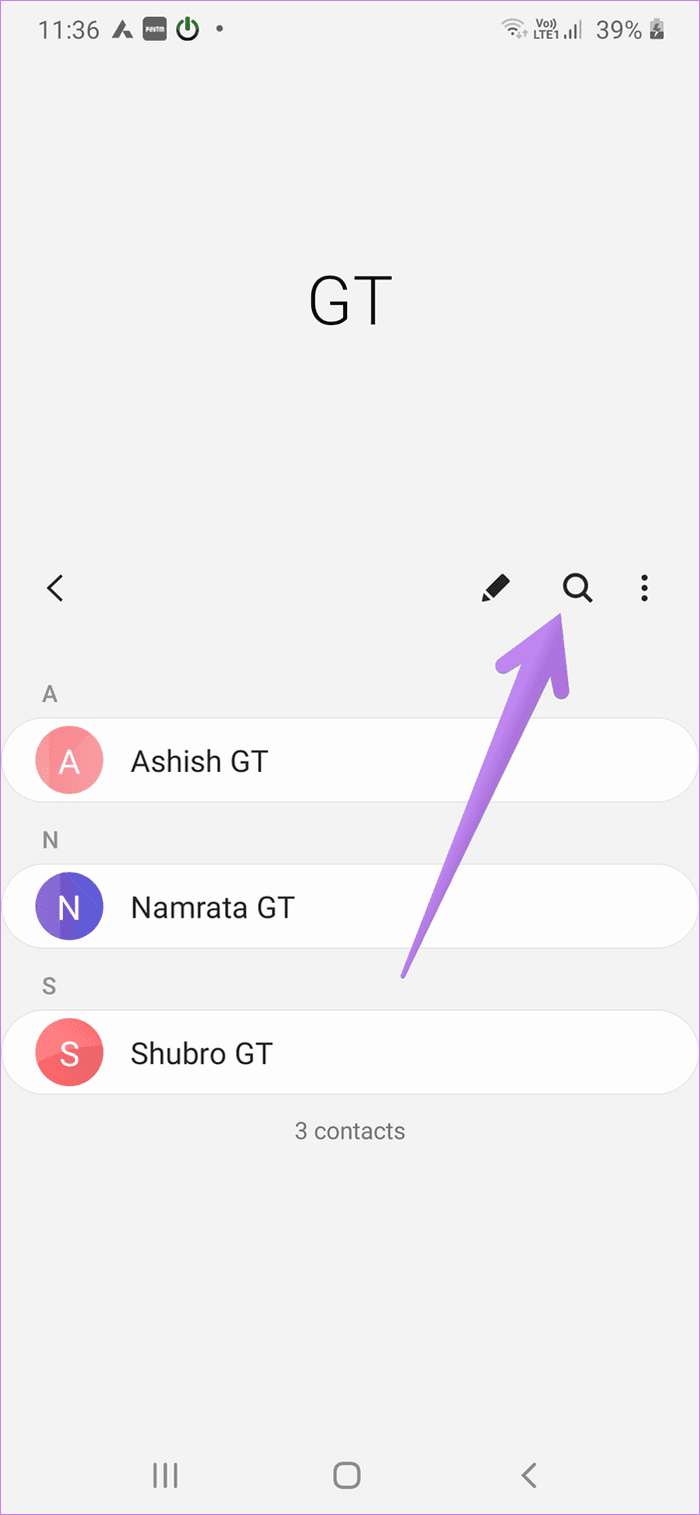
Often, you would like to verify whether a contact is added to any group or not. You can do it in two ways. Open the group. Use the search icon to look for contact if the group has many contacts.
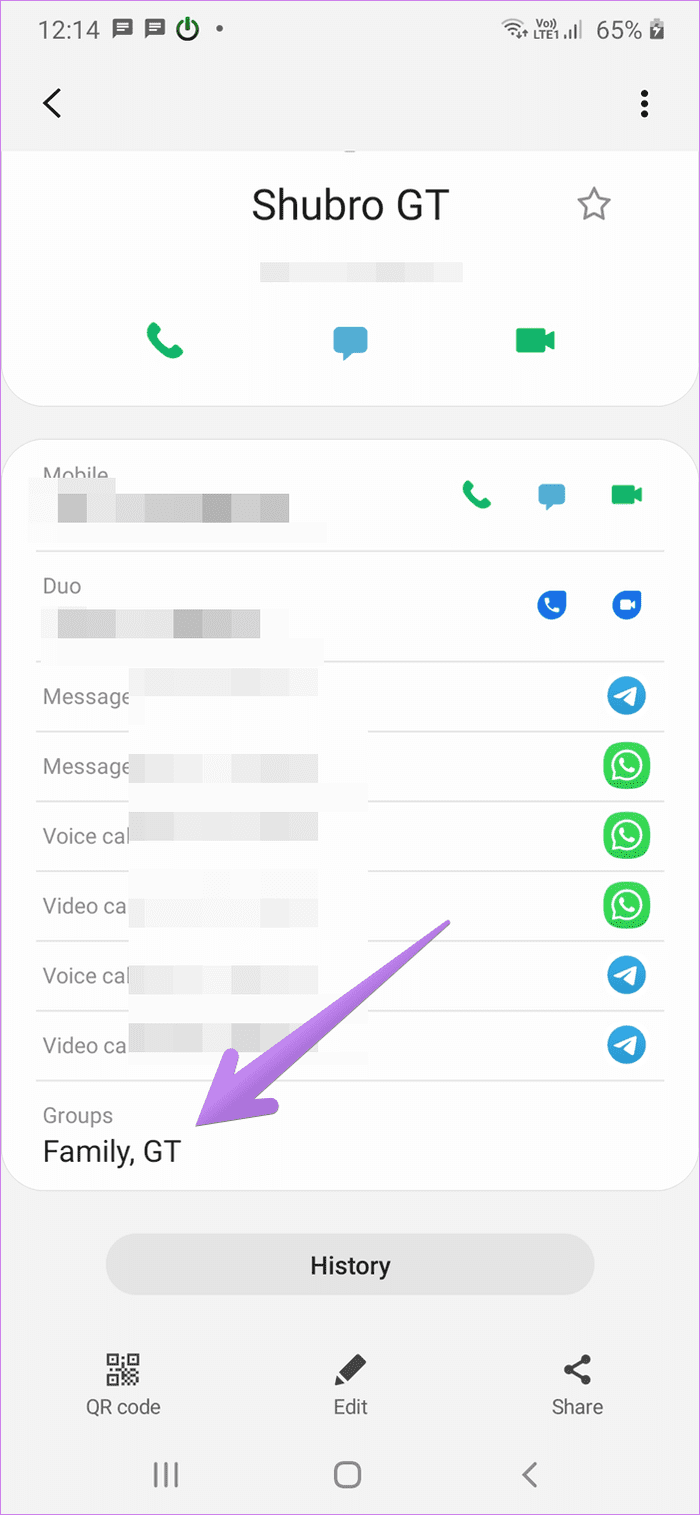
The method mentioned above is a bit tedious if a contact belongs to multiple groups. So the other method is to open the contact directly from the Contact or Phone app. You will see the assigned groups under the Groups section. If no group is assigned to the contact, you will not see the Group option.
Pro Tip: Check out tips and tricks to use the calling functionality in the best possible way on Samsung phones.
How to Change Group Name and Ringtone
For groups that you created on your own, you can rename them anytime. However, the group names that were made by Samsung cannot be edited. To rename a group, open the group and tap on the Edit icon. Enter a new name. On the same screen, you can add, remove, or change a ringtone for the group. The same ringtone will be used for all group members.


Pro Tip: Find out how to create your own ringtone on Android phones.
How to Send a Text or Email to All Group Contacts
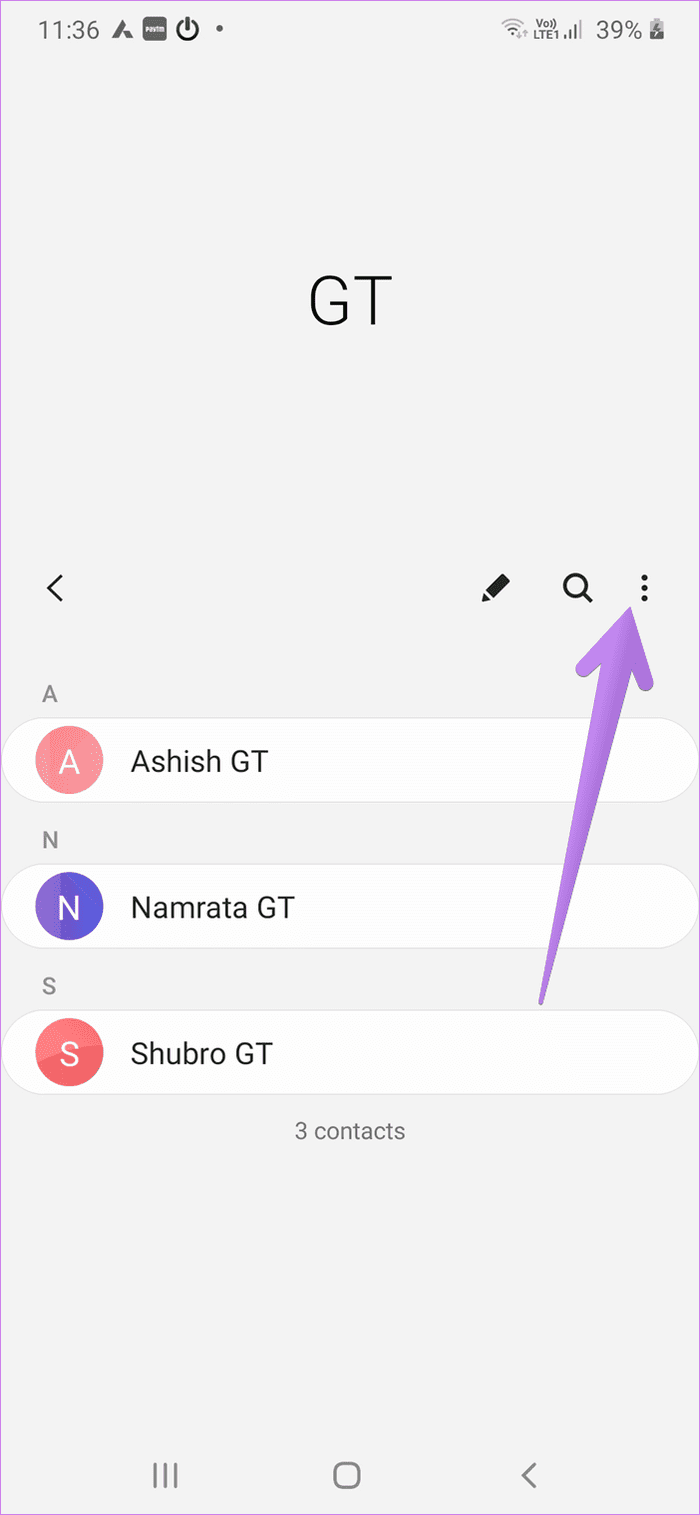
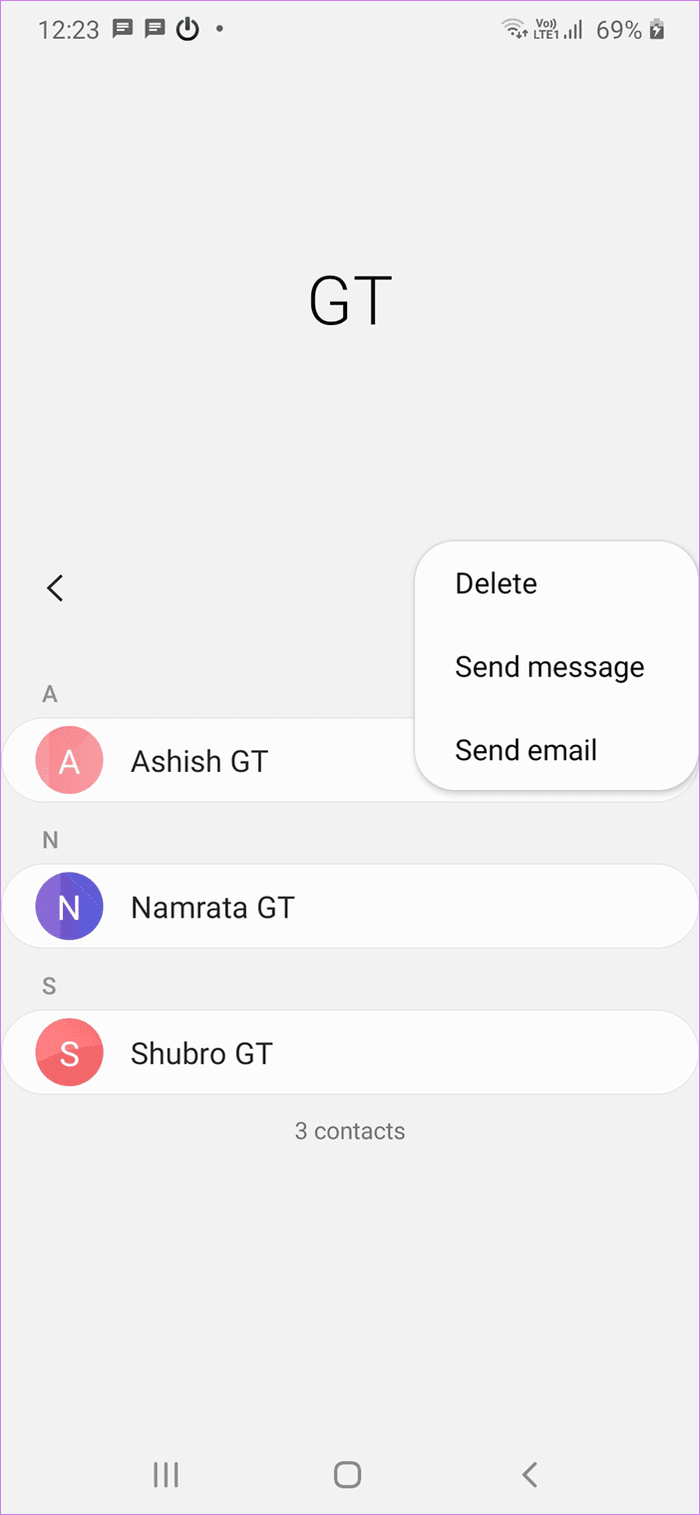
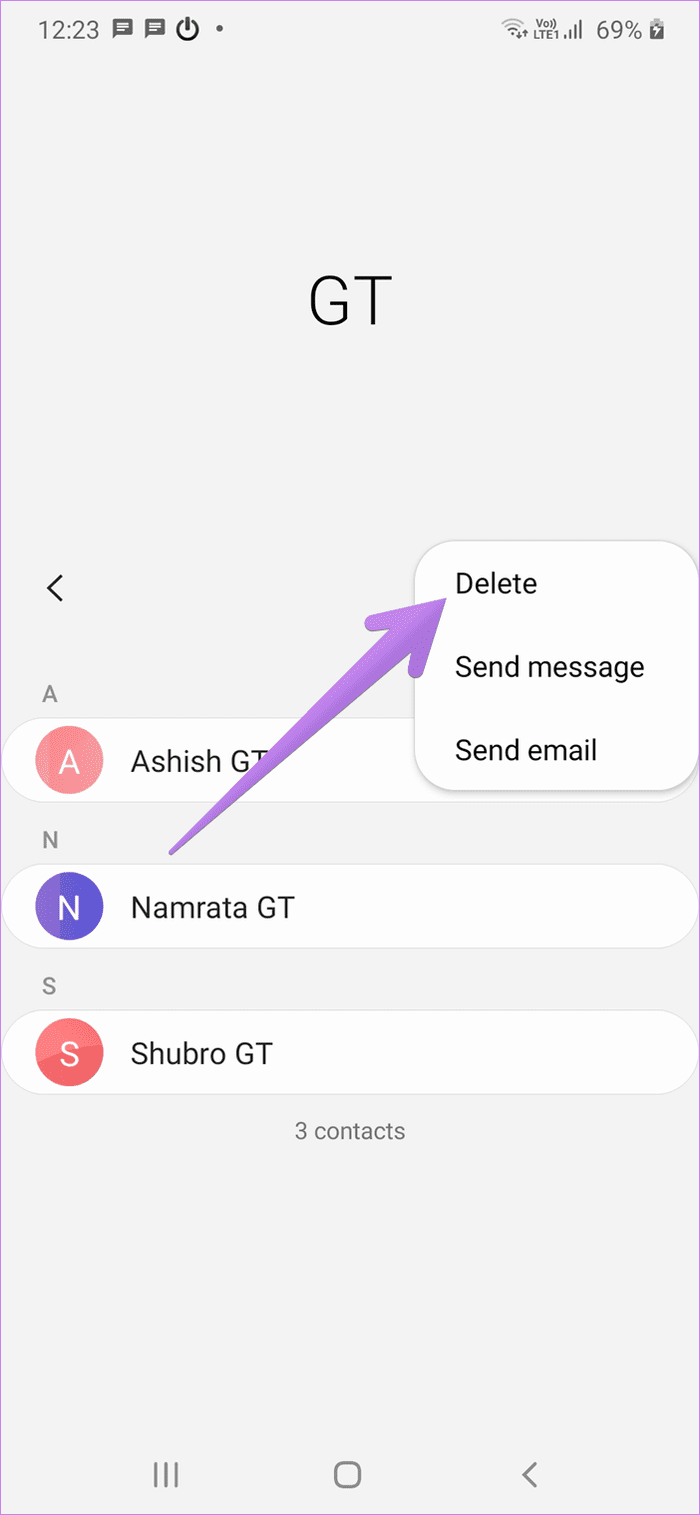
One of the best benefits of creating groups in Samsung is sending a mass text or email. To do so, open the required group from the Contacts or Phone app, as shown above. Tap on the three-dot icon. Select Send message or Send email. Add your message and send it. The message or email will be sent to all the contacts in that group.
How to Delete a Group
To delete a contact group that you created on your Samsung phone, open the group. Tap on the three-dot icon. Select Delete from it. You will be asked whether you want to delete the group only or delete both group and its members. Select the first option if you don’t want to delete the contacts from your phone. Go with the second if you want to delete contacts in bulk.

What an Idea
Creating groups to organize contacts is a thoughtful idea from Samsung. We hope other brands also replicate the feature. It also helps to delete contacts in bulk if you don’t need them after an event or something similar.
Next up: Scared of losing your contacts? Find out how to backup contacts on any Android phone from the next link.
Was this helpful?
Last updated on 07 February, 2022
The article above may contain affiliate links which help support Guiding Tech. The content remains unbiased and authentic and will never affect our editorial integrity.


