Method 1: Using Command Prompt
Step 1: Press the Windows key on your keyboard, type Command Prompt, and click Run as administrator.
Step 2: Type or copy the below command and press Enter.
REG ADD "hklm\software\policies\microsoft\windows defender" /v DisableAntiSpyware /t REG_DWORD /d 1 /f

Method 2: Using the Settings App
Step 1: Press the Windows key on your keyboard, type Settings, and click Open.
Step 2: Go to Privacy & security settings.
Step 3: In Privacy & security settings, under Security, click on Windows Security.

Step 4: Go to the Virus & threat protection option.
Step 5: Under the ‘Virus & threat protection settings’ section, click on Manage settings.
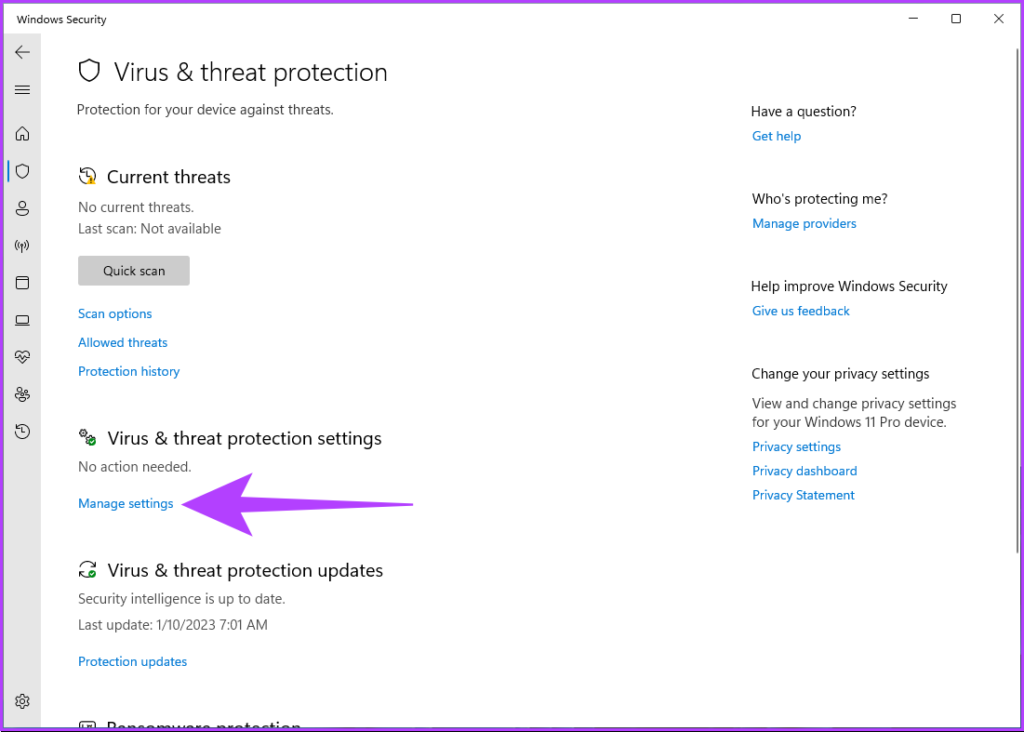
Step 6: Now, disable the Real-time protection toggle and other toggles on this page.
Note: If prompted, click Yes.

If you want Windows Defender to stay disabled, you must keep toggling off the settings every time Windows resets it. However, if you want to disable Windows Defender permanently, jump to the next method.
Method 3: Using Registry Editor
Before you proceed with the steps, you must disable Windows Defender Tamper Protection.
Step 1: Press the Windows key on your keyboard, type Settings, and click Open.
Step 2: Go to Privacy & security settings.
Step 3: In Privacy & security settings, under Security, click on Windows Security.
Step 4: Under Protection areas, select Virus & threat protection.

Step 5: Select Manage settings.

Step 6: Toggle off Tamper Protection.

Now, let’s go to Registry settings. Because we will be using Registry Editor, we strongly advise you to back up the Windows Registry and follow the steps below.
Step 7: Press the Windows key on your keyboard, type Registry Editor, and click Run as administrator.
In the prompt, select Yes.
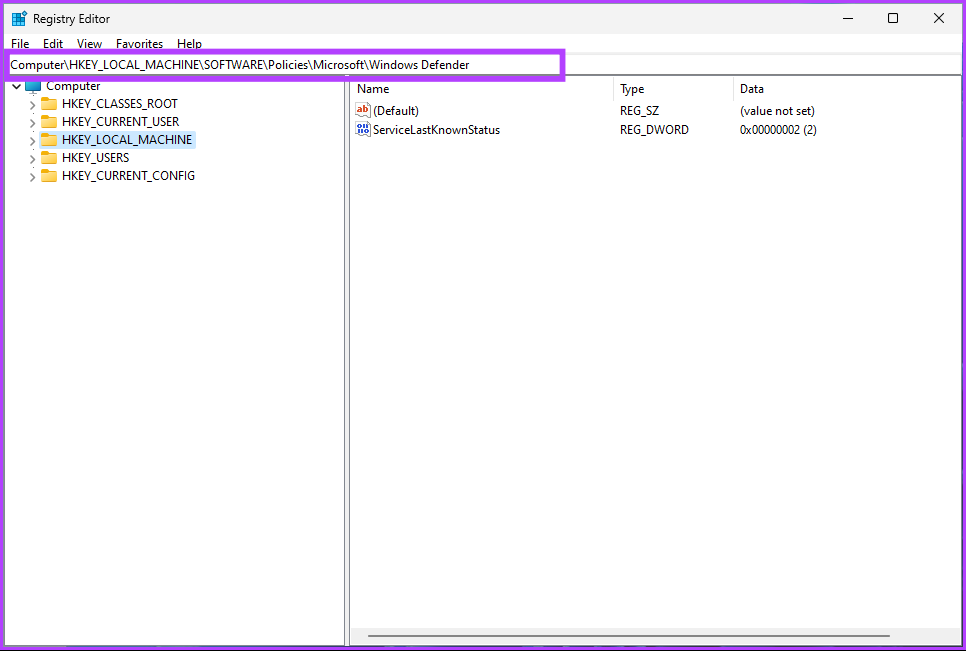
Step 8: In the top address bar, enter the mentioned address and press Enter.
HKEY_LOCAL_MACHINE\SOFTWARE\Policies\Microsoft\Windos Defender
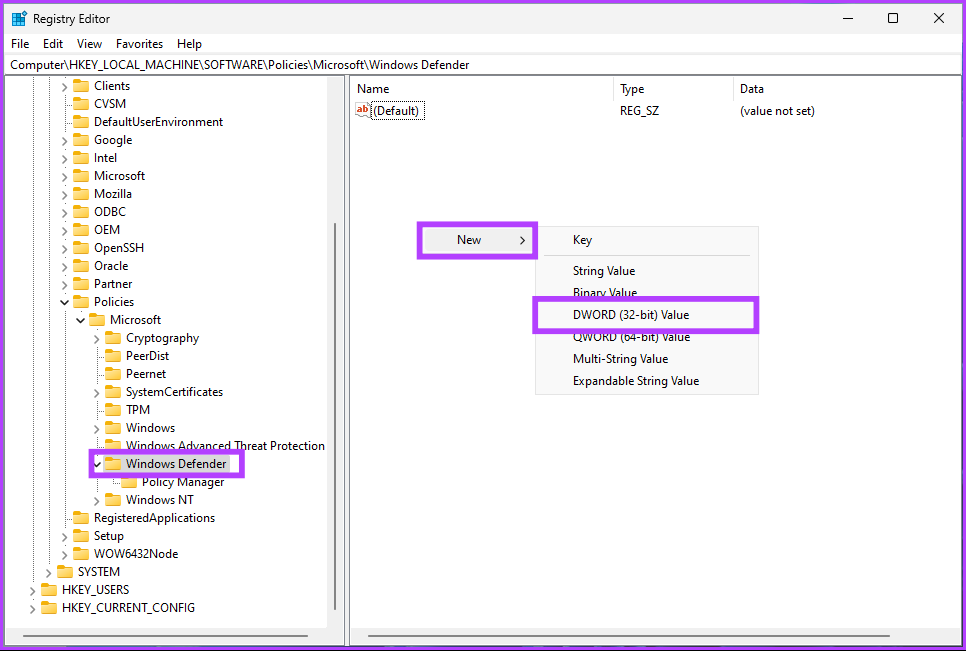
Step 9: Under the Windows Defender folder, right-click, select New, and choose DWORD (32-bit) Value.
Step 10: Type DisableAntiSpyware in the name field.
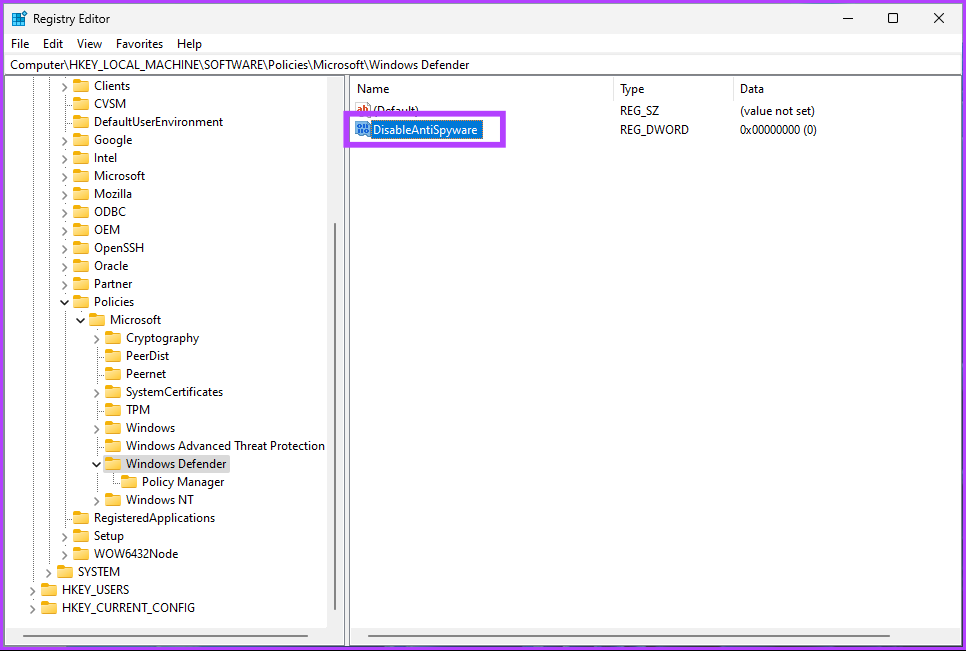
Step 11: Double-click the new value, type 1 in the Value Data field, and press OK.

Finally, reboot the system to implement the changes. When the system boots back and you try to load Windows Defender, you will see an error message saying, ‘This application is turned off by group policy.’
Method 4: Using Group Policy Editor
The Group Policy Editor is exclusive to Windows 11 Pro and Enterprise versions. If you are using Windows 11 Home Edition, you can skip this method.
Step 1: Press the Windows keys on your keyboard, type gpedit, and click Open.
Step 2: In the left pane, under Local Computer Policy, select Computer Configuration.

Step 3: In the right pane, double-click on Administrative Templates.
Step 4: Select Windows Components.
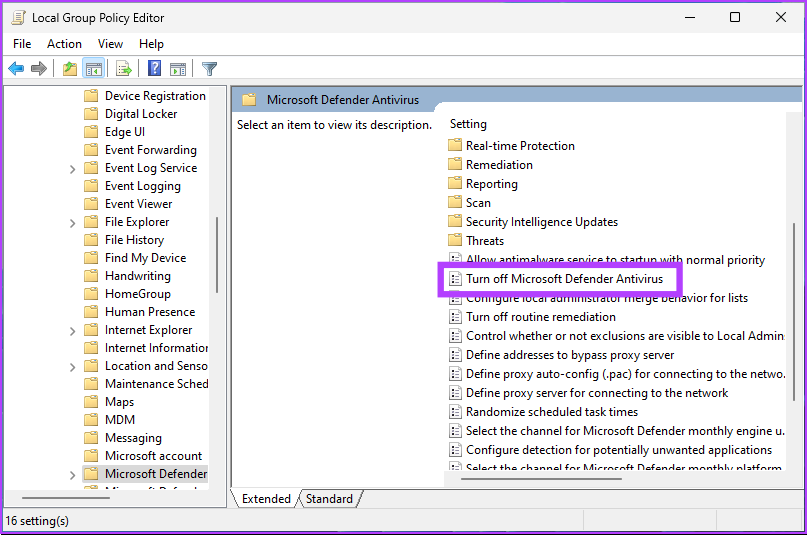
Step 5: Under Windows Components, select Microsoft Defender Antivirus.

Step 6: Under the Microsoft Defender Antivirus, locate and double-click on the Turn off Windows Defender Antivirus option on the right.
Step 7: In the new window, select Enabled. Finally, click on Apply > OK.
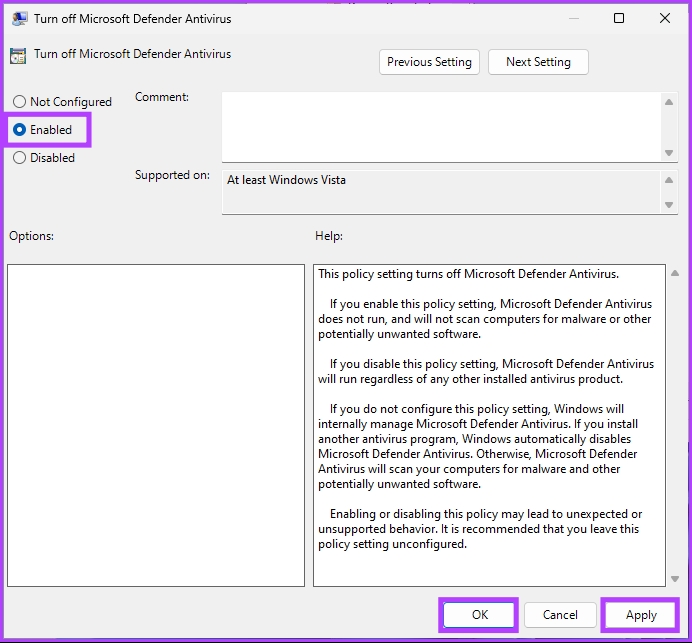
There you go. Now, all you need to do is restart Windows. And once it boots back up, Windows Defender would have been disabled. Whenever you try to open it, an error message will pop up.
If you want to roll back any time in the future, go under the Turn off Windows Defender policy > select Disabled > click Apply > OK.
Method 5: Using a Third-Party Antivirus
There are many antivirus programs for Windows. If you choose to use any, Windows Defender automatically gets disabled. This is, by far, the easiest way to disable Windows Defender.
Here’s how to check if the third-party antivirus is correctly installed. Follow the instructions below.
Step 1: Press the Windows key on your keyboard, type Settings, and click Open.
Step 2: Go to Privacy & security settings.
Step 3: In Privacy & security settings, under Security, click on Windows Security.
Step 4: Under Protection areas, select Virus & threat protection.
Step 5: Select Manage providers in the far right.

Under security providers, you will see that third-party antivirus is turned on. In contrast, Microsoft Defender is turned off.

You may see that the Windows Firewall is still active. It happens when the antivirus doesn’t have a firewall. If it does, Microsoft Defender’s firewall gets turned off automatically.
Was this helpful?
Last updated on 31 May, 2024
The article above may contain affiliate links which help support Guiding Tech. The content remains unbiased and authentic and will never affect our editorial integrity.


