Stealing images is quite a negative trend these days. That’s because one can easily download images. Even though it’s tough to stop someone from doing that, one can take measures to avoid it. For instance, you can add a logo to your image.

If you are an artist, photographer, or just a brand with real pictures, adding a logo can help you in distracting people from misusing your photos. So how does one do that with limited resources on Windows PC?
The Paint app comes to the rescue. In 2017, Microsoft announced that Paint will be replaced by Paint 3D. However, both are available on Windows 10 currently. And the good news is Paint will stay for a while.
So, in this post, we will tell you how to add a logo to an image in Paint and Paint 3D. As a bonus tip, you will also get to know how to watermark images in these apps.
Add Logo in MS Paint
MS Paint doesn’t let you add an image on top of another image. That means, there is no direct way to add a logo to your picture. However, a simple workaround exists that takes the help of the traditional copy-paste method.
Here’s what you need to do.
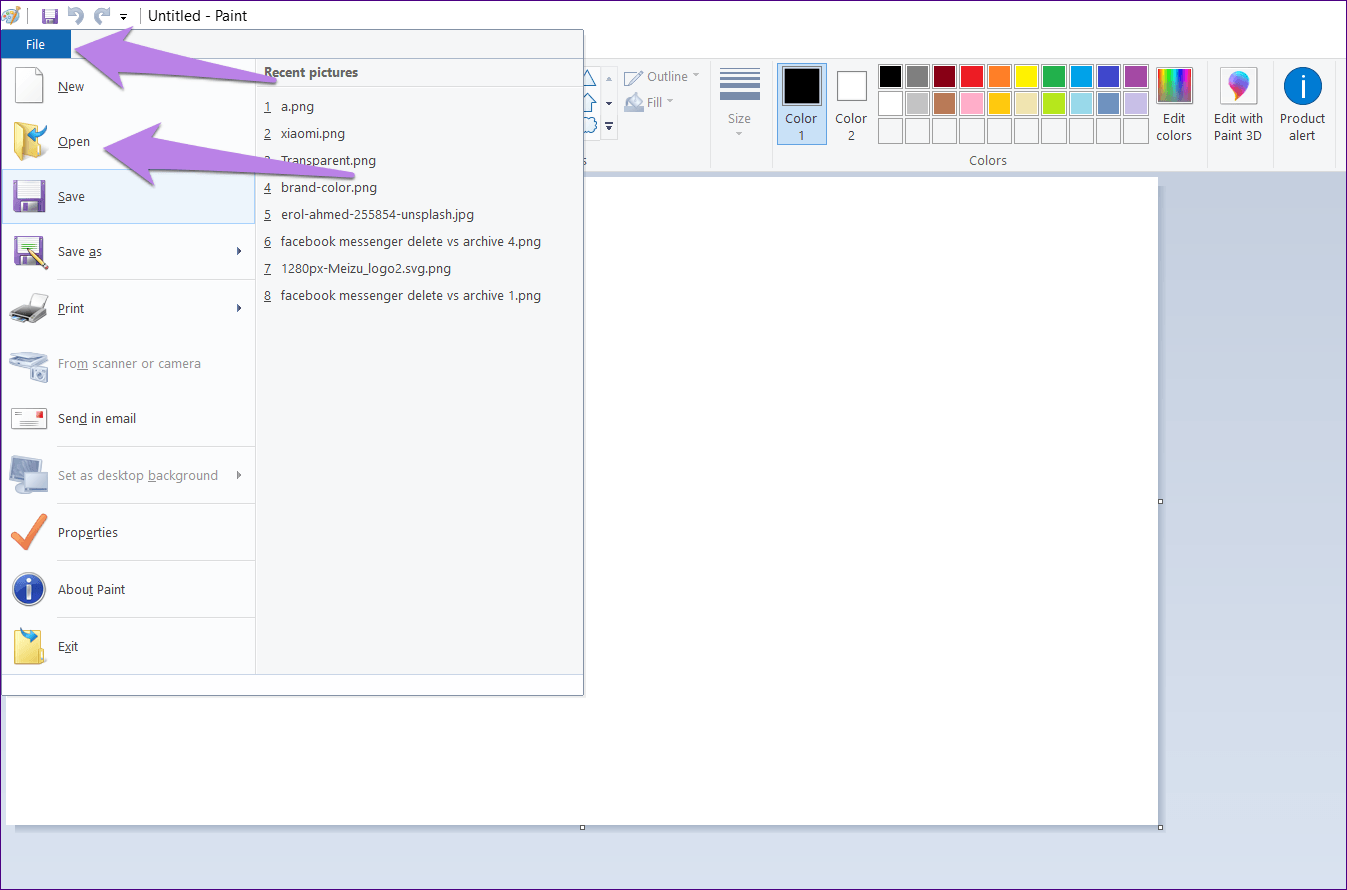
Step 1: Launch MS Paint. Click on File followed by Open. Navigate to the logo file that you want to put on your picture.
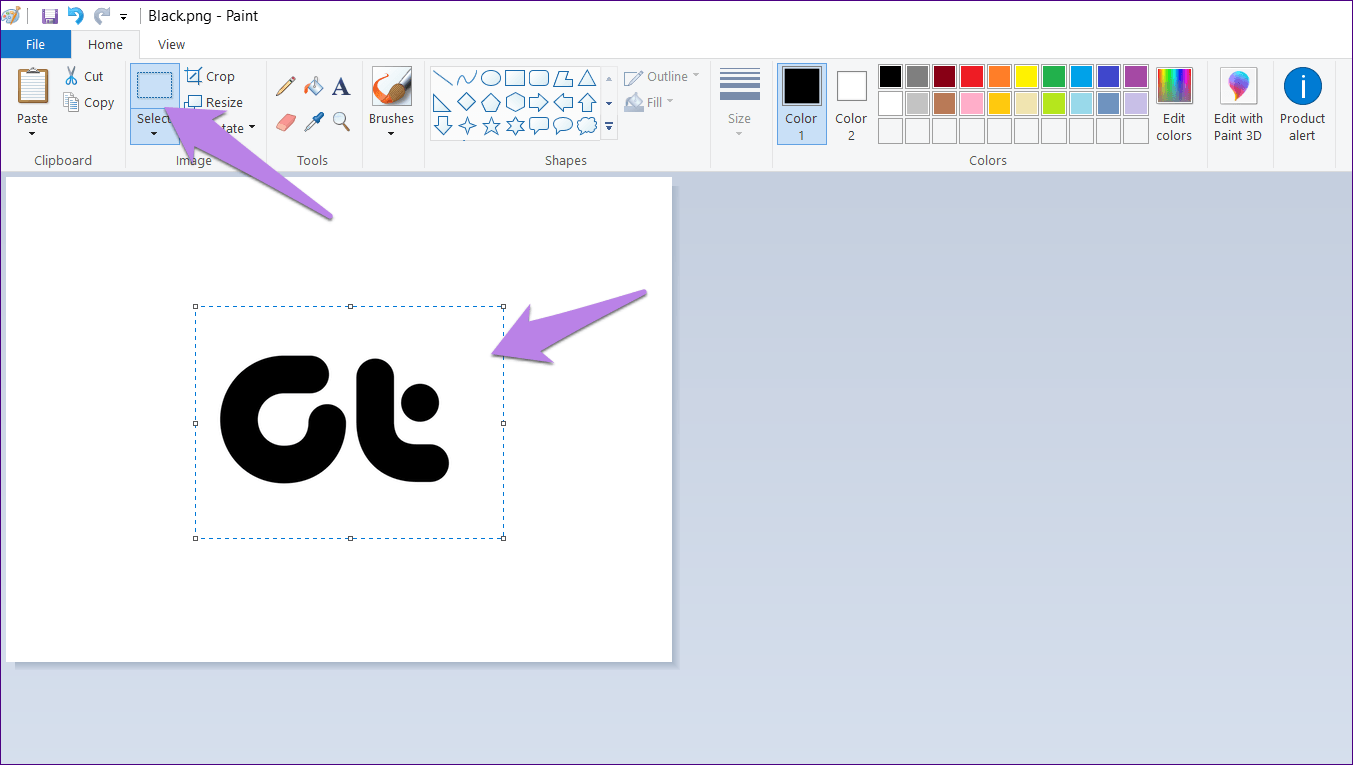
Step 2: Once it opens in Paint, click on the Select tool and select the area of the logo.
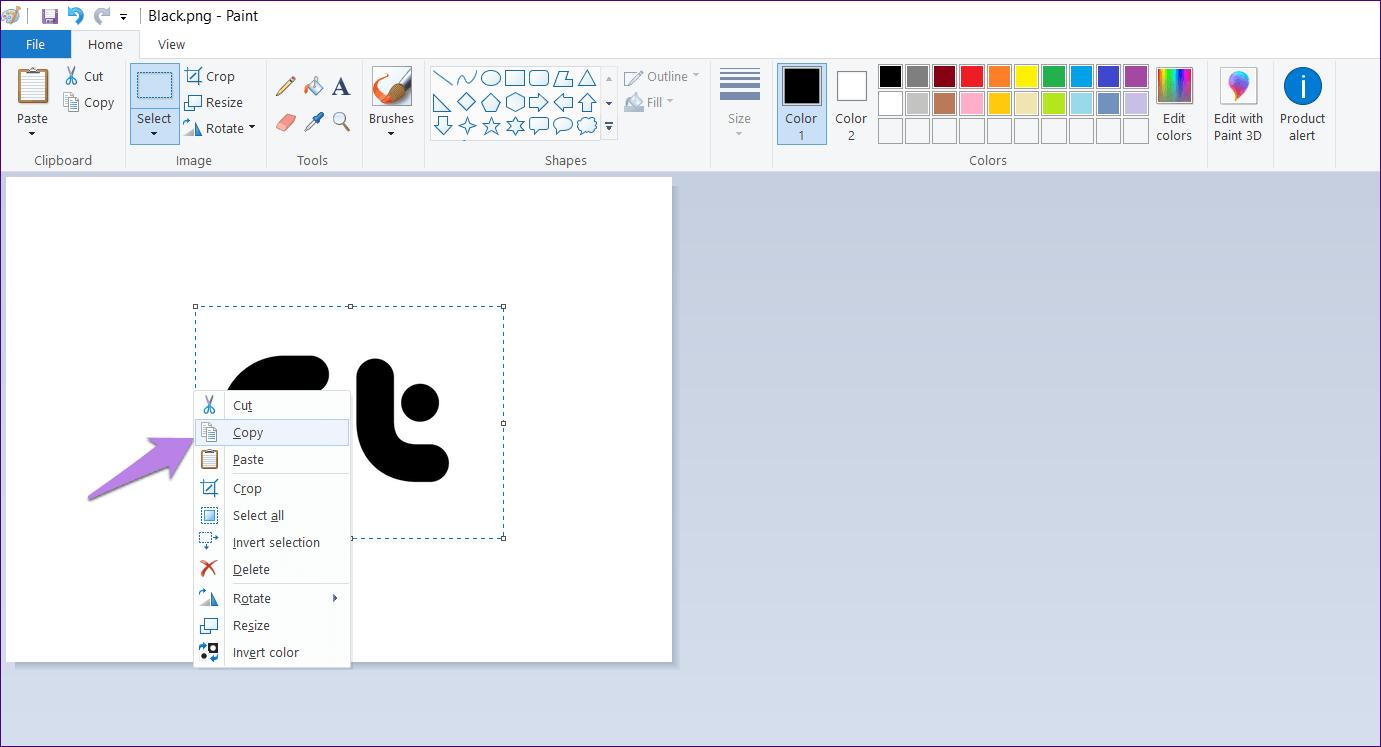
Step 3: Right-click on the selected area and hit Copy from the menu. Alternatively, press Ctrl + C.
Step 4: Again, go to File > Open. Now launch the photo on which you want to add your logo.
Step 5: When the image opens in Paint, right-click on it, and select Paste from the menu. You can even use the shortcut Ctrl + V to paste from the clipboard.
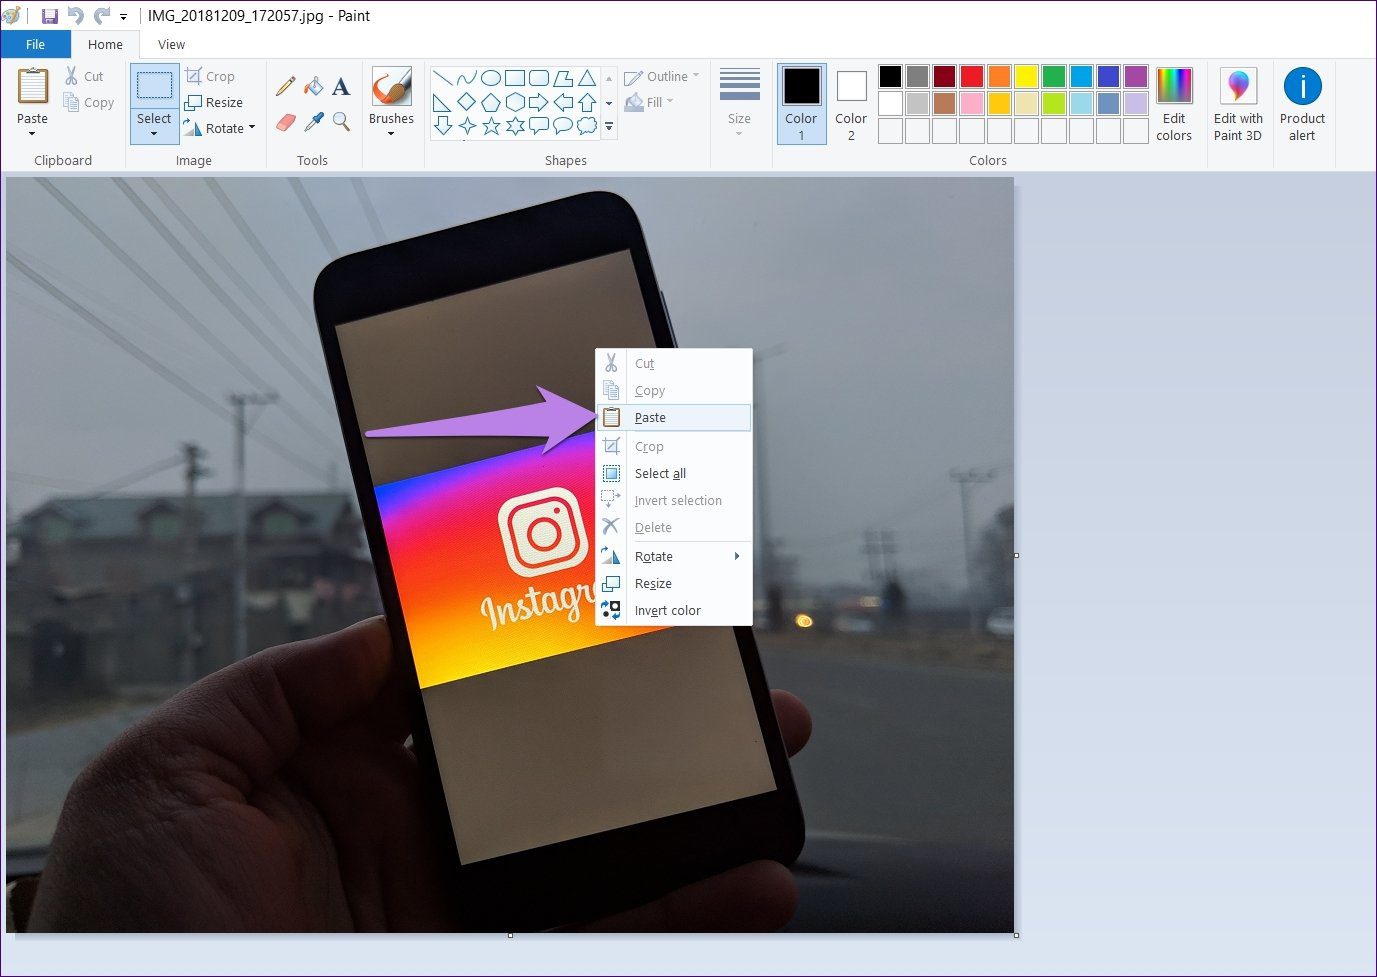
Step 6: Keep your mouse pointer over the pasted image and drag it to your preferred position.


Step 7: Finally, click on File > Save as and save the image in any format that you like. It’s not necessary to save the image in PNG format to retain the transparency of the logo here. That has been retained anyway by pasting it on the picture.
Also, the first three steps are avoidable if you open your logo file in any other photo viewer or editing app. However, in those apps too, you need to copy the logo first and then paste it on the actual image in Paint.
Add Logo in Paint 3D
Thankfully, the upgraded Paint 3D offers an easy way to put a logo on a picture. Here’s what is to be done.
Step 1: Launch Paint 3D on your PC.
Step 2: Click on Menu at the top followed by Open > Browse files. Now open the image on which you want to add your logo. Yes, you have to open the image directly — no need to open the logo first.
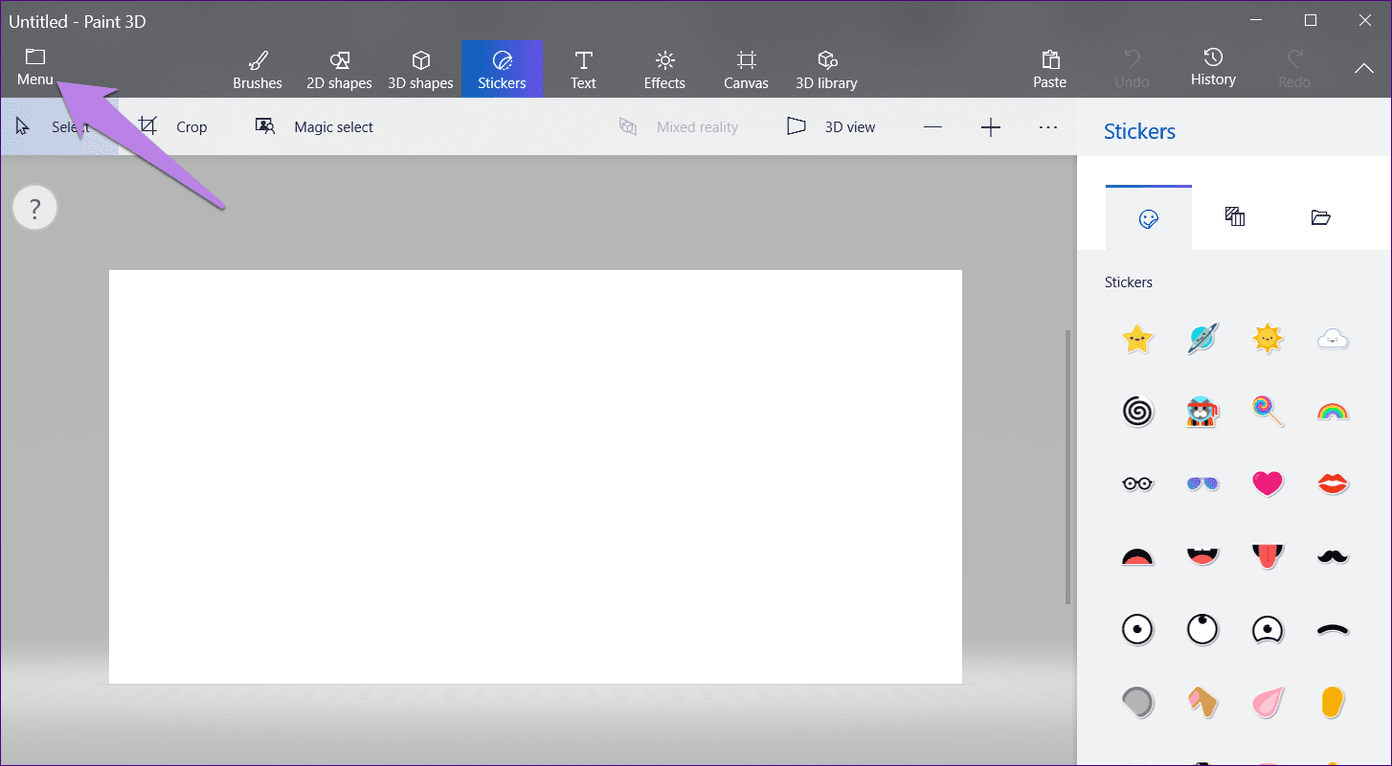

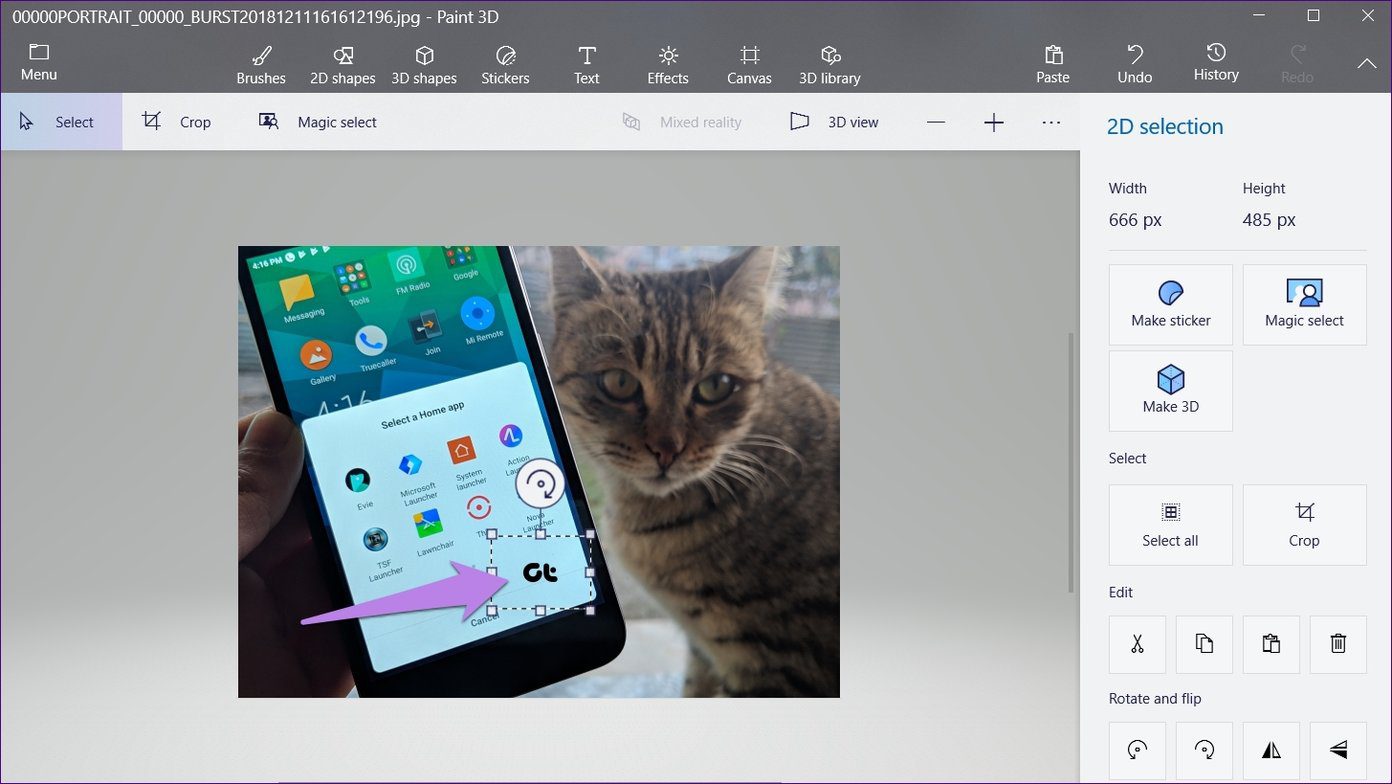
Step 3: Once the image opens, again click on the Menu at the top. Inside the menu, hit the Insert option. Then navigate to your logo and open it.

Step 4: The logo will be added to your image. You can resize it, change its position, rotate it, and do other transformations. You can even create a sticker from it. By doing that, you can easily add it to other images.
Watermark in Paint and Paint 3D
We will start with Paint first followed by Paint 3D.
Add Watermark in Paint
Step 1: Open the image on which you want to add a watermark in Paint.
Step 2: Click on the text icon (A) present in the toolbar to insert text. Then click anywhere on the image.

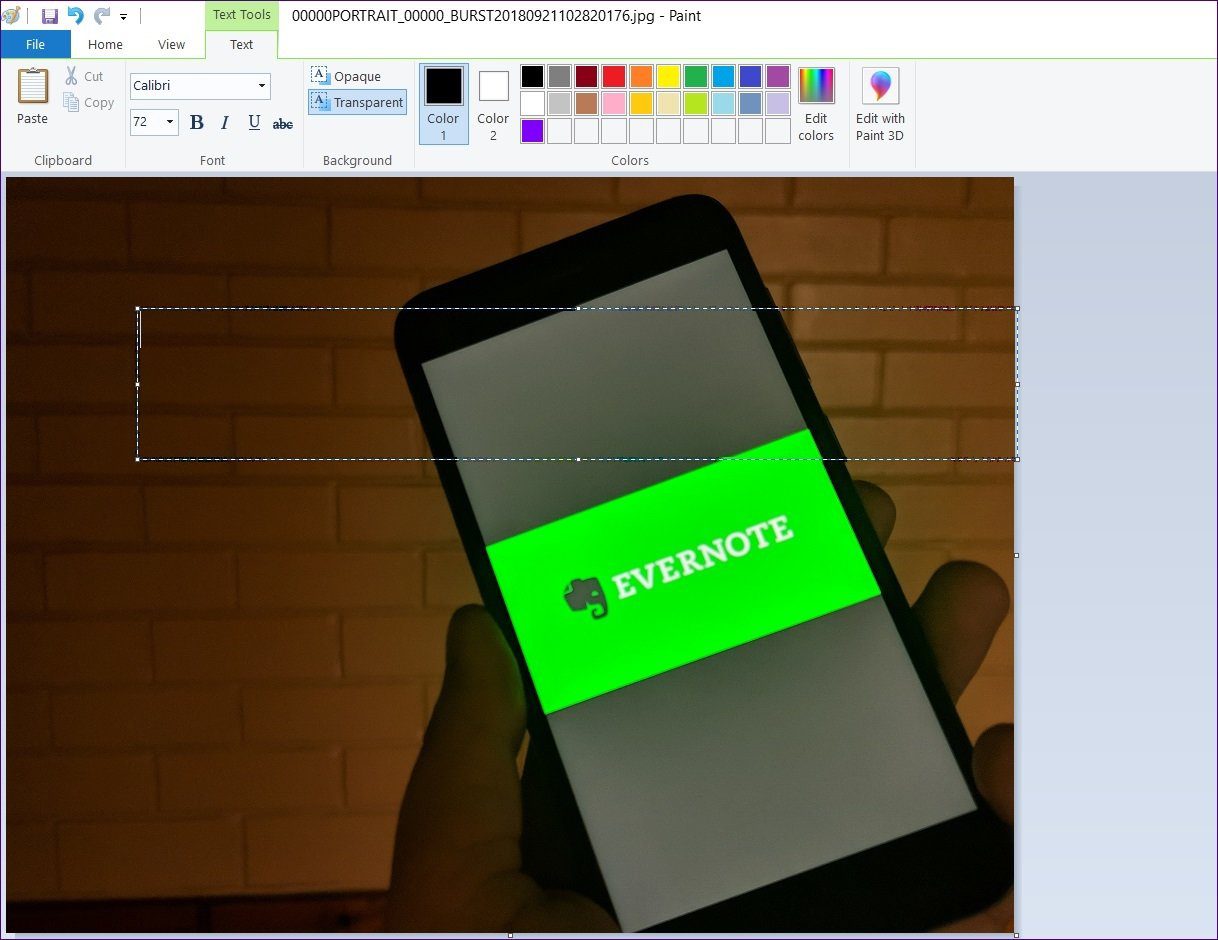
Step 3: Type your watermark in the text box. You can change its formatting (size, color, style, etc.) from the options at the top.
Tip: To make any changes to the text, select it first.
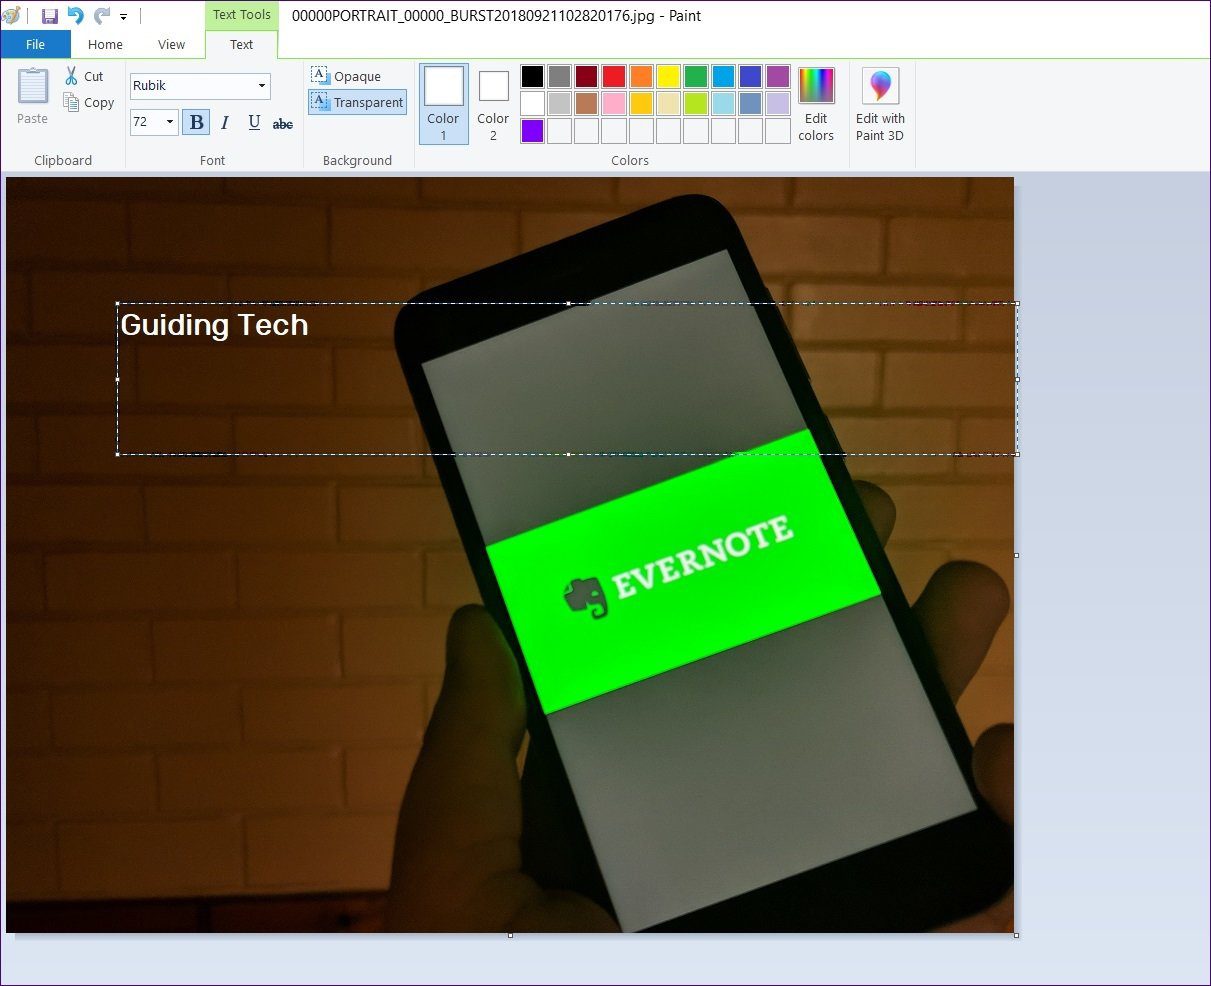
If you want the watermark to have a background color, click on the Opaque option and change the color from the color palette.
Step 4: Finally, move the watermark to your preferred location on the image. For that, hover your mouse over the dotted lines. When the mouse pointer changes to a four-arrowed icon, drag it.
Note: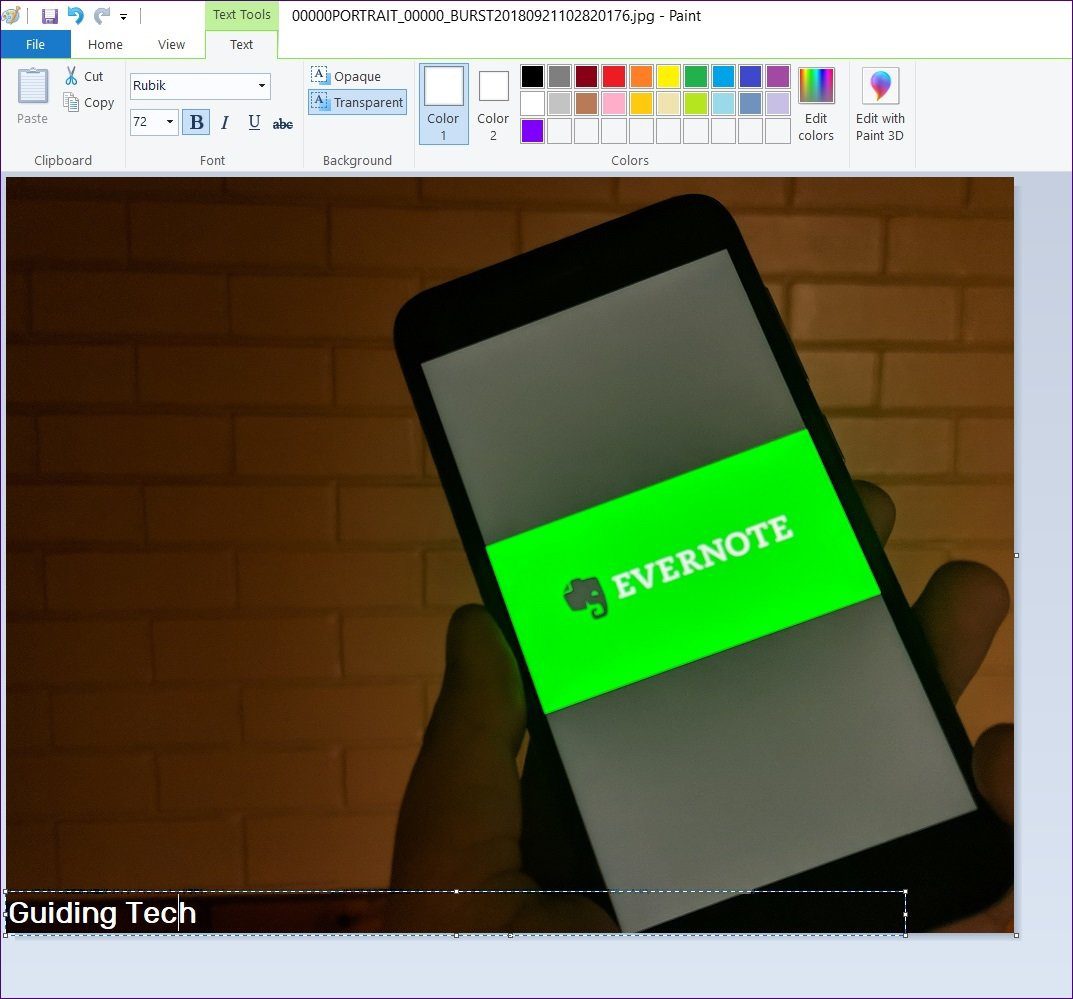
Step 5: Using File > Save as, save your image with the watermark on it.
Add Watermark in Paint 3D
Step 1: Open the image in Paint 3D.
Step 2: Click on the Text tool at the top and select 2D or 3D text from the sidebar. Then click on the image to insert the text.
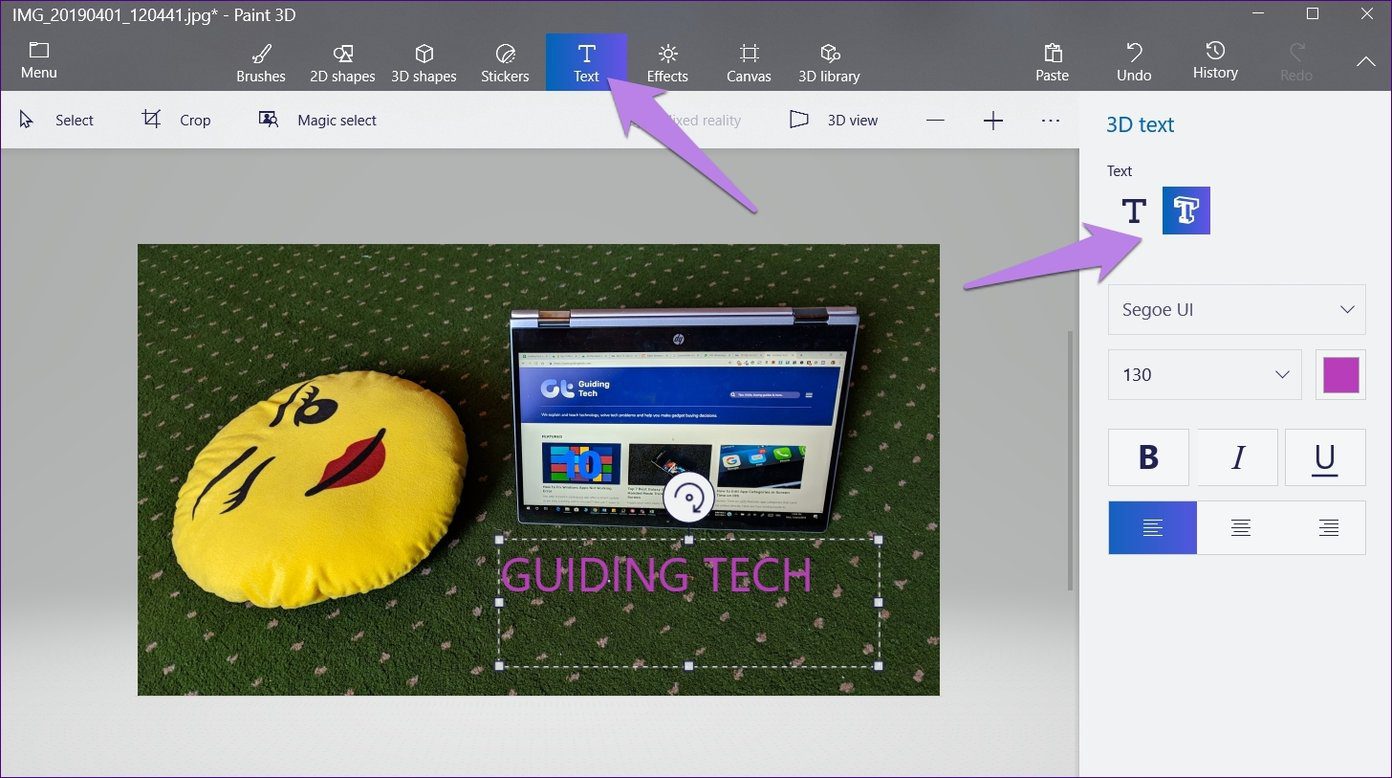
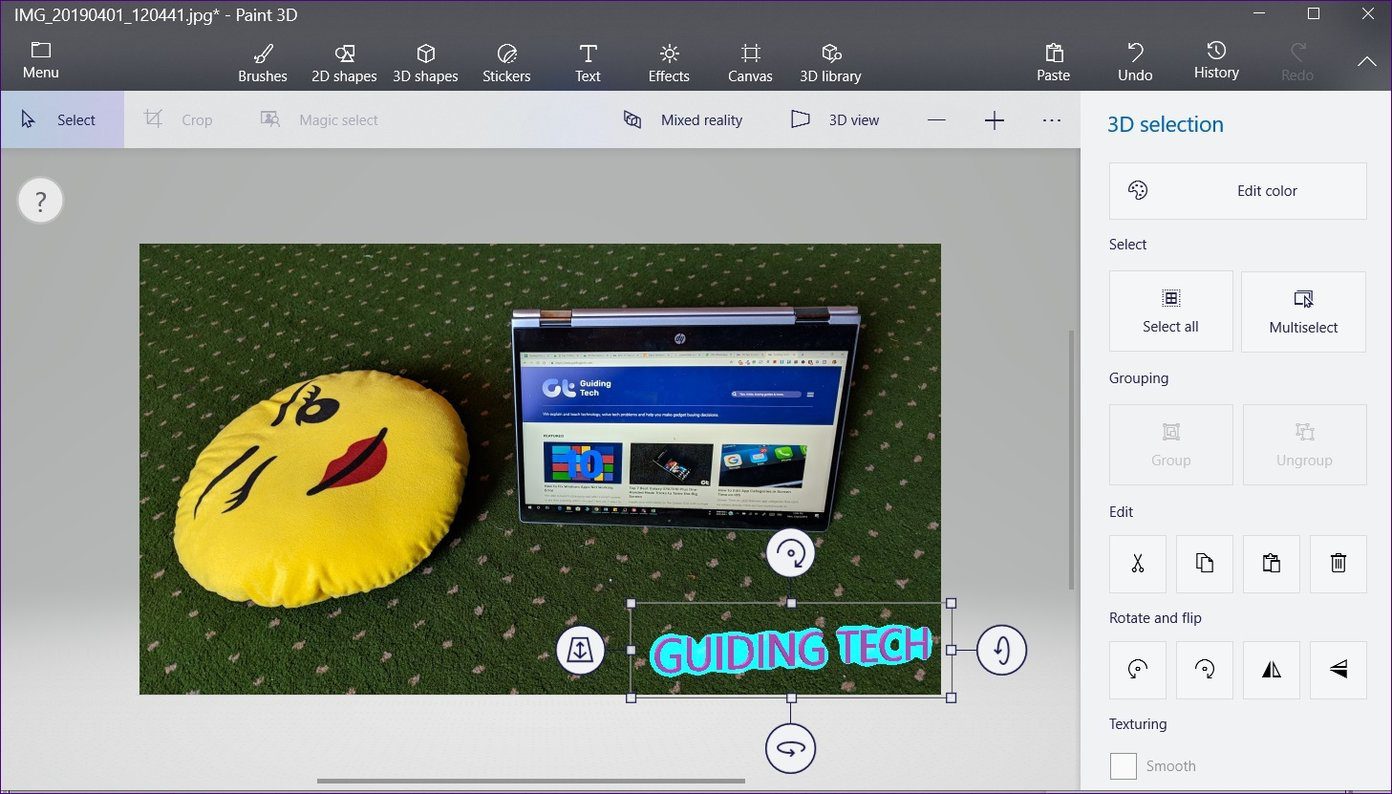
The benefit of using 3D text is that you can modify the text even if you click outside the text box, which isn’t possible with 2D text. Further, the 3D text adds a depth effect.
Step 3: Once you make all the changes to the watermark, save your image using Menu > Save as.
Tip: You can create a custom logo in Paint 3D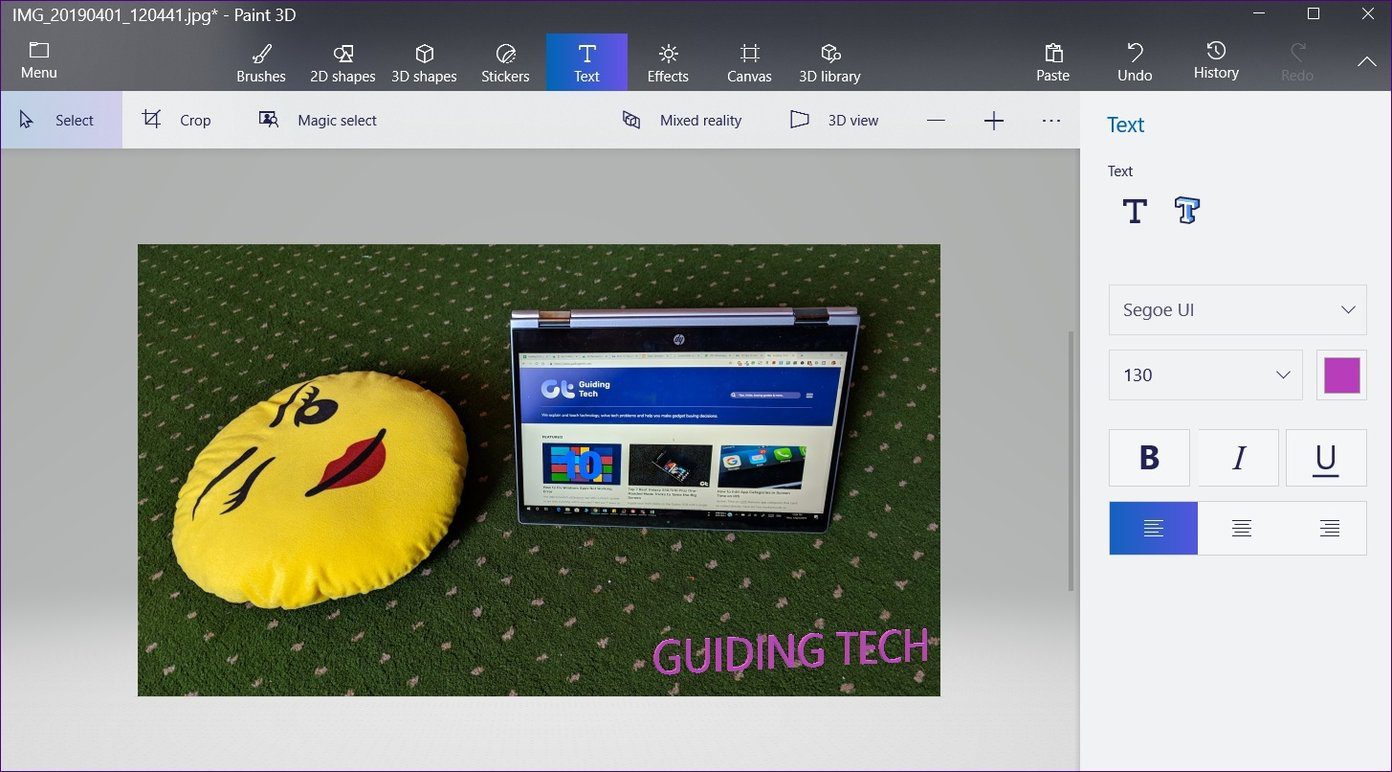
Always Add Logos
It’s a good idea to add logos or watermarks to your images. Now that you know how easily you can do it on a Windows PC without any third-party software. So make it a habit.
Next up: Wondering why there are two screenshot-taking apps — Snip & Sketch and Snipping tool on your Windows PC? Read the next article to out the difference between them.
Was this helpful?
Last updated on 13 July, 2021
The article above may contain affiliate links which help support Guiding Tech. The content remains unbiased and authentic and will never affect our editorial integrity.


