Microsoft recently announced that they have made the Power Automate Desktop completely free for all Windows 10 users. Those of you who don’t know what that is, think of it as macros that you can use to automate repetitive tasks. Microsoft calls it attended Robotic Process Automation, which you can use to create automated workflows connecting different desktop and web apps on Windows.

Microsoft offers Power Automate’s paid plans if you need unlimited flows or add more users to the mix, starting at $15 per user per month. Let us first look at the free version and understand what Power Automate Desktop is, how it works, why you may need it, and how to set it up.
What Is Power Automate Desktop
Microsoft acquired Softomotive last year and has been working on integrating it with their ecosystem ever since. The result is Power Automate Desktop, but what is it?
Have you ever used IFTTT or Zapier before? If you have, then you already know what to expect from Power Automate Desktop. These are automation tools that connect web and mobile apps to create complex workflows consisting of tasks that execute when certain preset conditions are met. Power Automate Desktop is Microsoft’s take for Windows and the larger Microsoft ecosystem and incorporates many third-party apps and services.
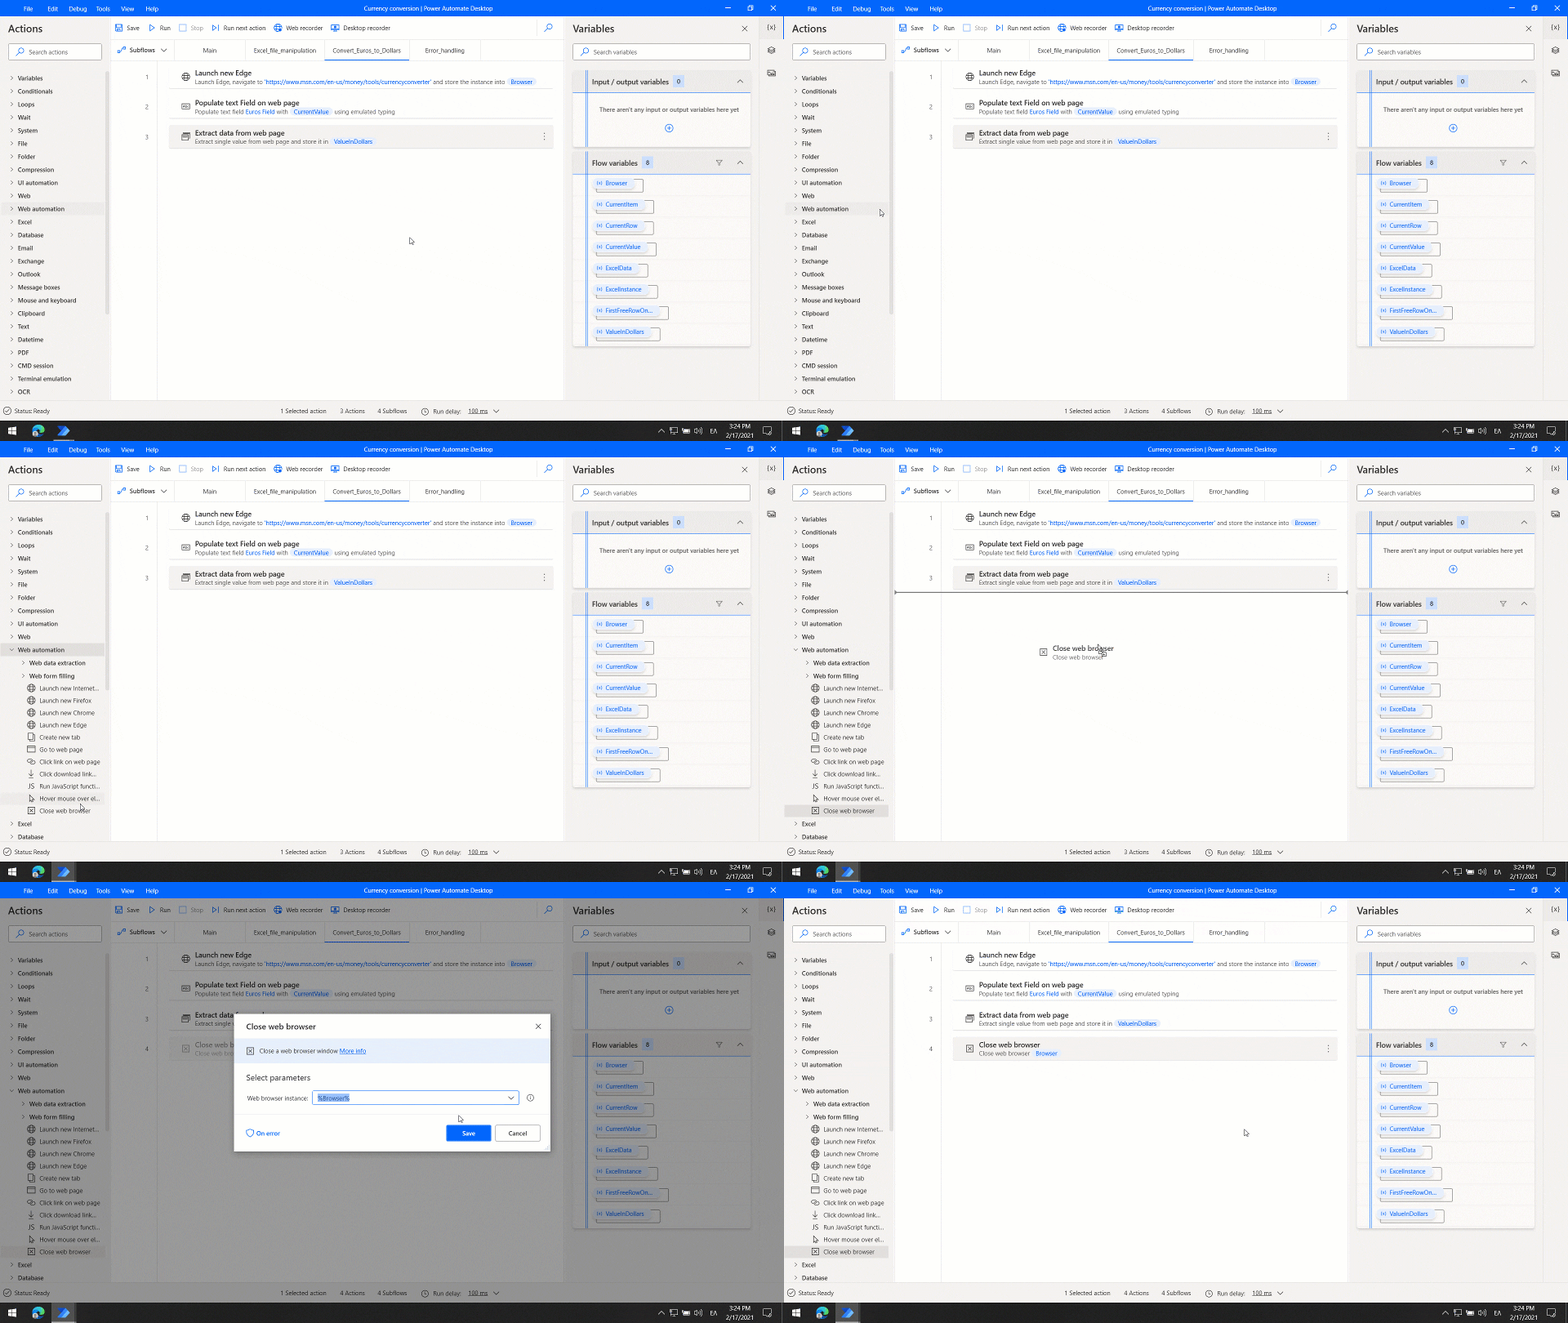
Microsoft first created Macros that users could use, for example, to open a specific app using a combination of keys. Macros are a set of instructions bundled together into a single instruction that expands when initiated to perform a particular task.
Think of Power Automate Desktop as an advanced version of Macros that comes with a drag and drop interface, making it easier to create workflows consisting of multiple actions, each leading to the next one. This makes it easy to automate repetitive tasks that do not need your attention or time, allowing you to focus on more complex issues requiring human intervention and attention.
How Power Automate Desktop Works
Step 1: Download the free version using the link we shared above. Sign in using your Microsoft account. Use the same one that you are using on your Windows computer.
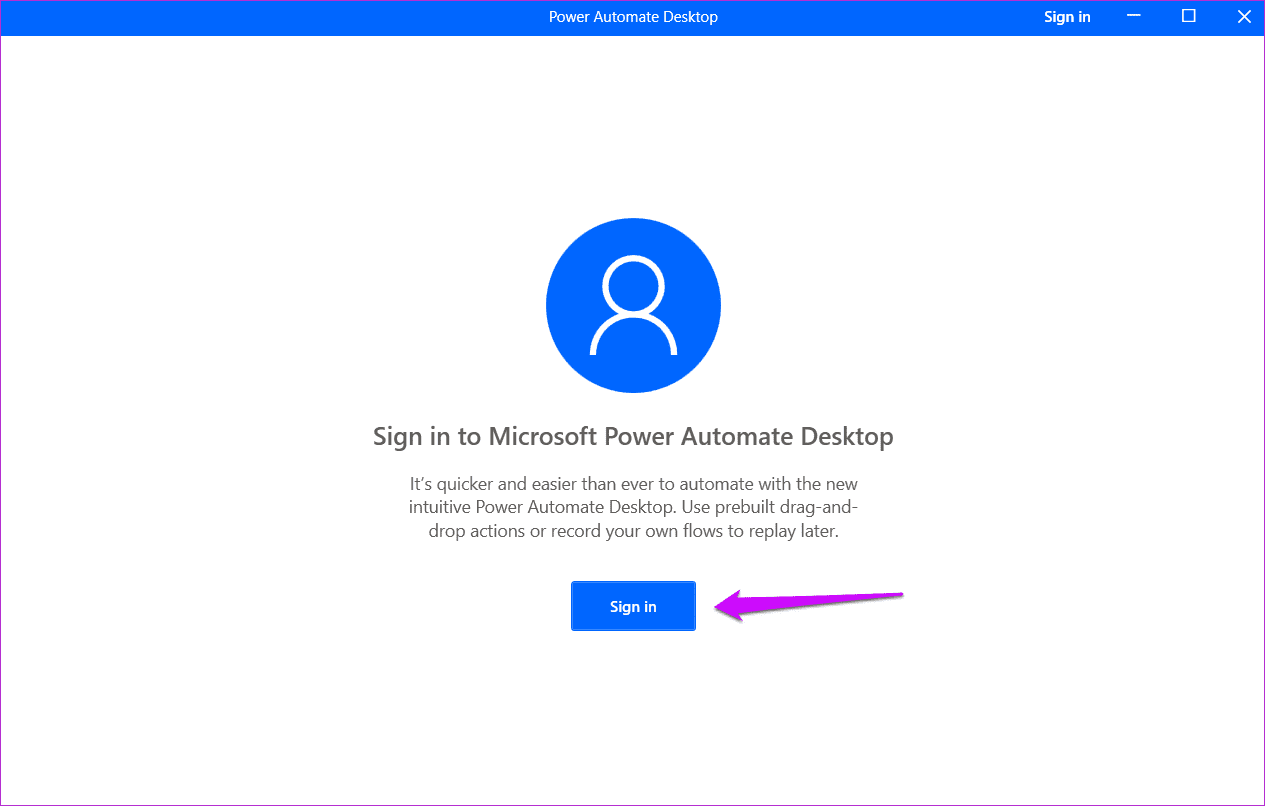
Step 2: Click on the New Flow button to begin the process once you are signed in.
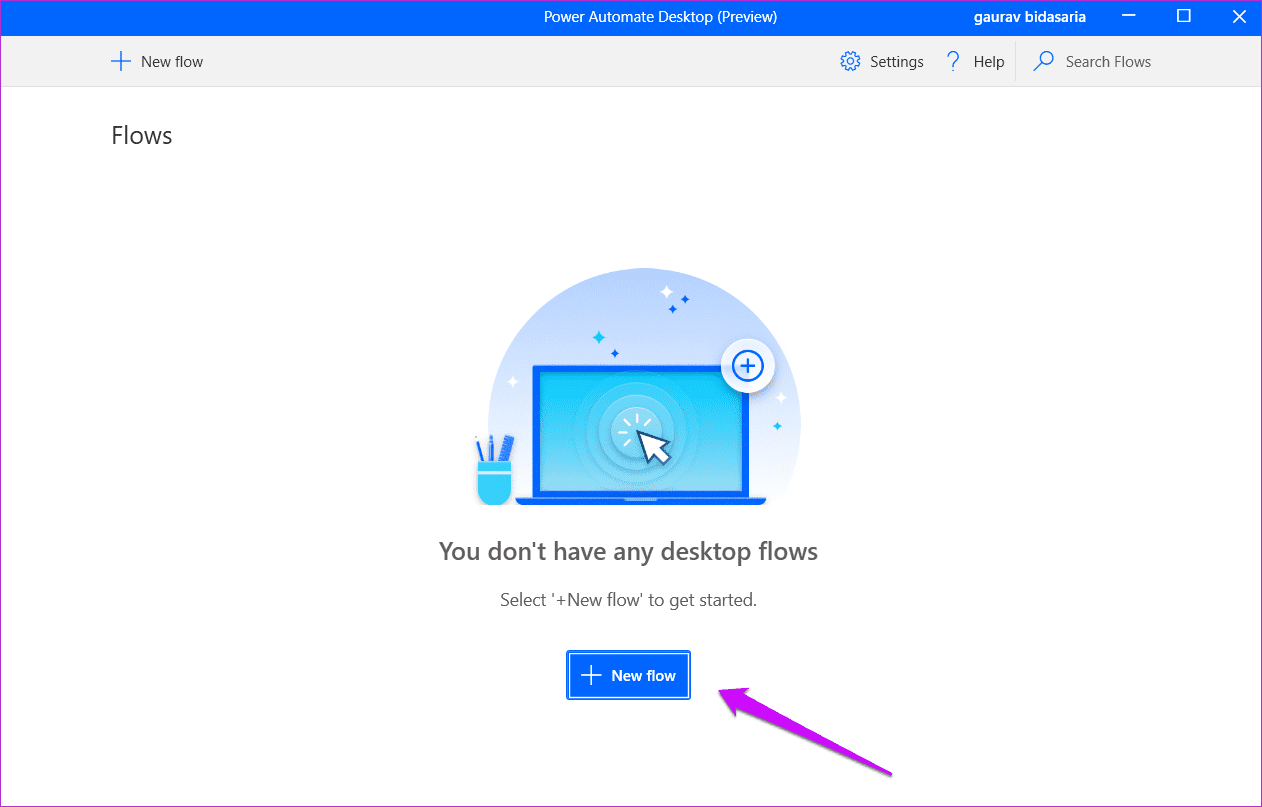
Step 3: Choose a name for your Flow, or the app will autogenerate one. Click on Create at the bottom to continue.

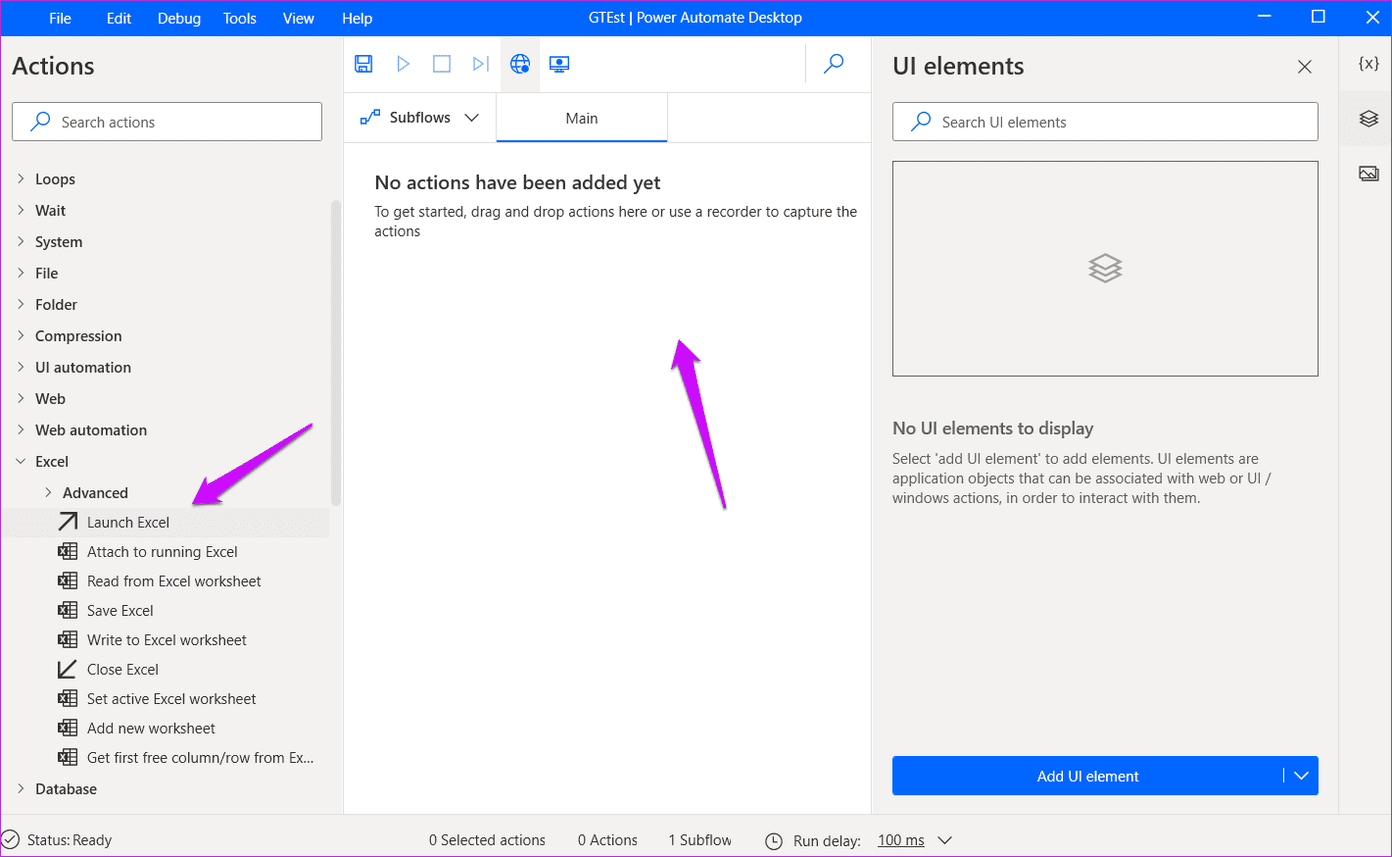
Step 4: Your newly created Flow will open in a new pop-up where you will find a list of actions on the left. Double-click on any action category to expand it, and you shall find more related actions. Let’s keep things simple for the sake of this guide. Drag-n-drop Launch Excel under Excel to the Main tab.
Step 5: You can either create and open a new Excel file or open an existing one. We will create a new one. Click on Save.

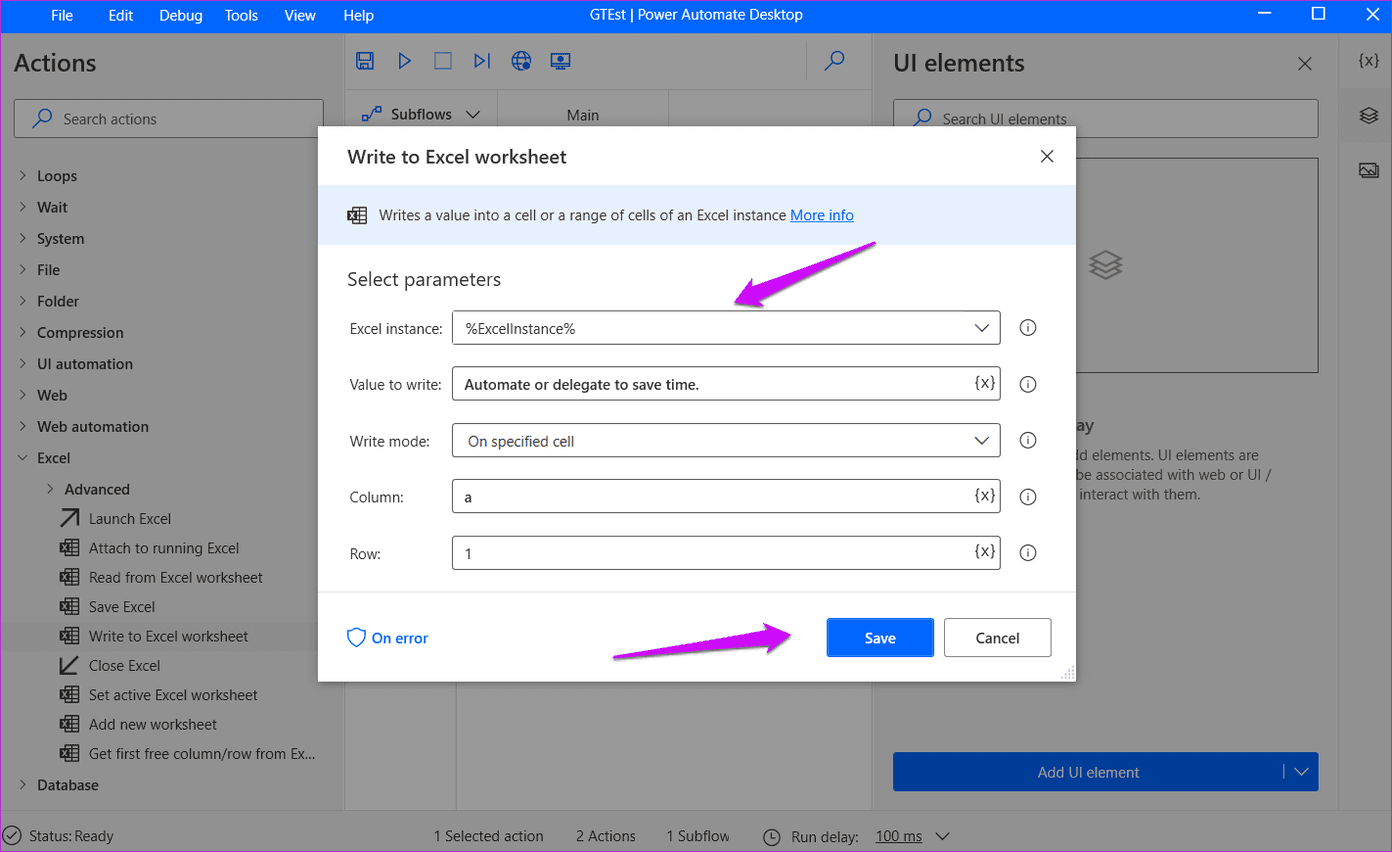
Step 6: Select ‘Write to Excel worksheet’ now, write a message or value that you want to input, and select the row and column you want to enter. Save changes.
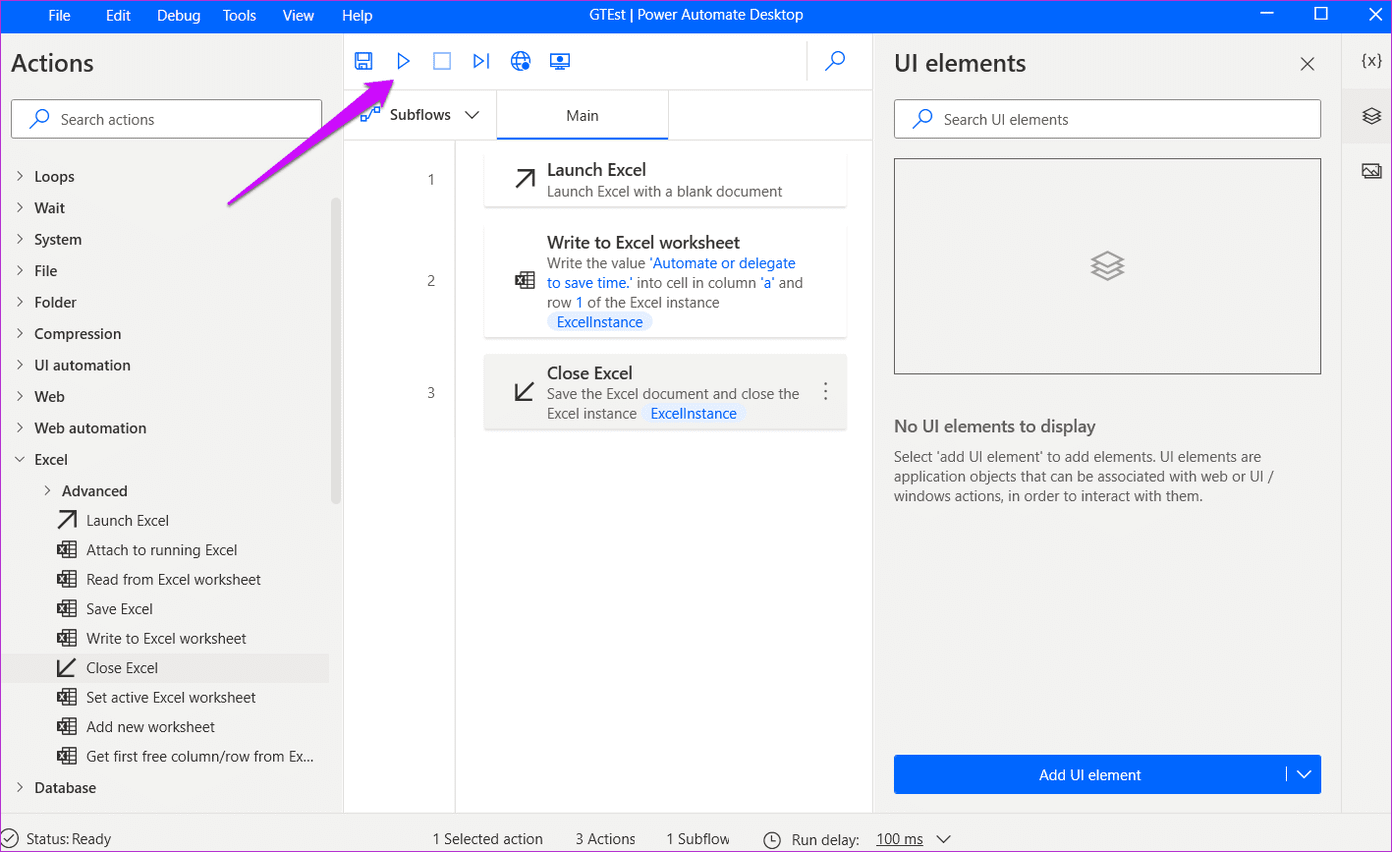
Step 7: Finally, choose Close Excel. This is how your workflow should look. Clicking on the Play button will help you test the workflow and make sure everything is working as you planned.
Step 8: If something goes wrong, you will view a message with subflow number so you know exactly which step you need to fix. In our case, it was the third step and we could view the workflow running in real-time. A new Excel sheet opened on the desktop, the message was written in the row/cell that we input but the Excel sheet didn’t close correctly.
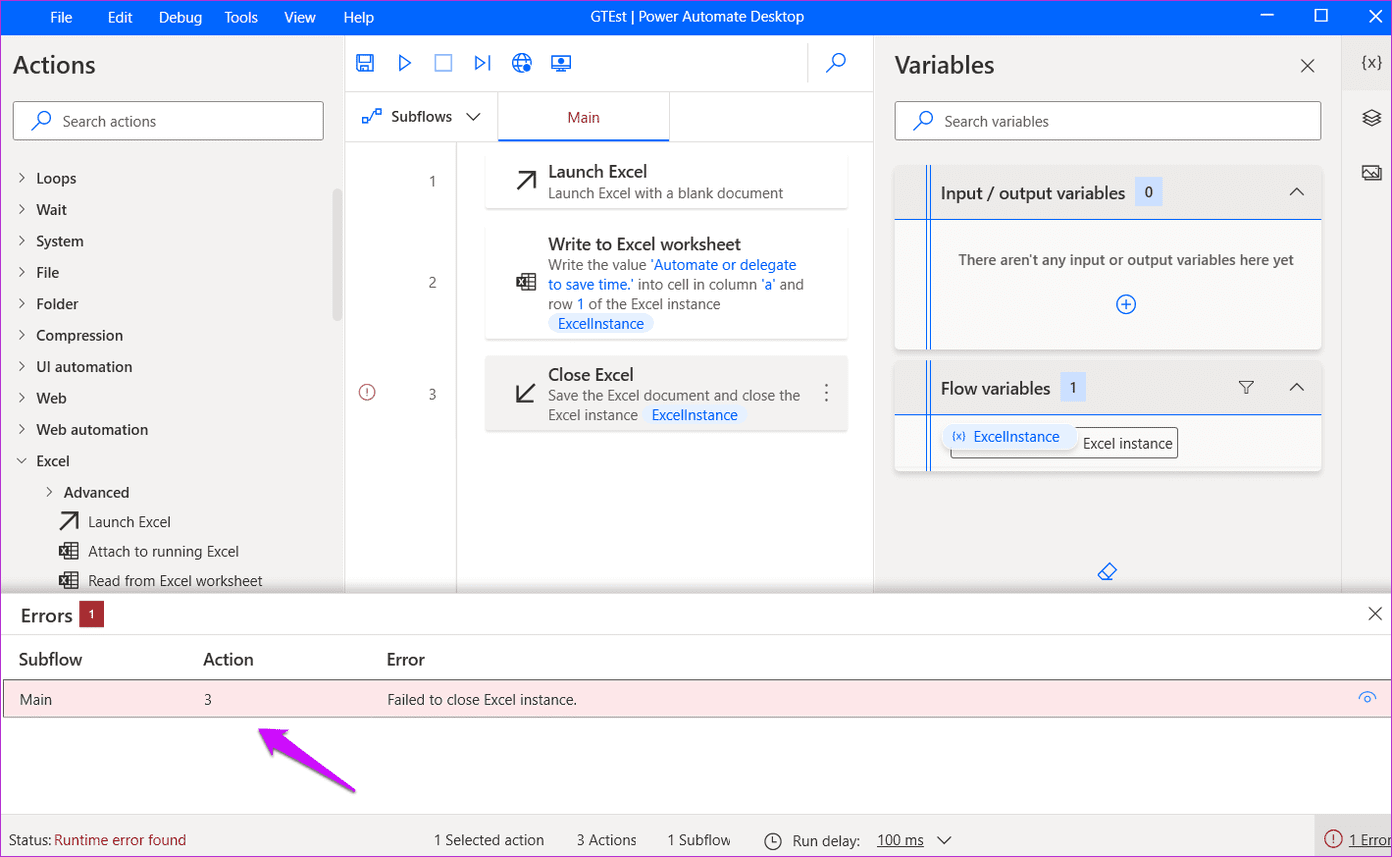
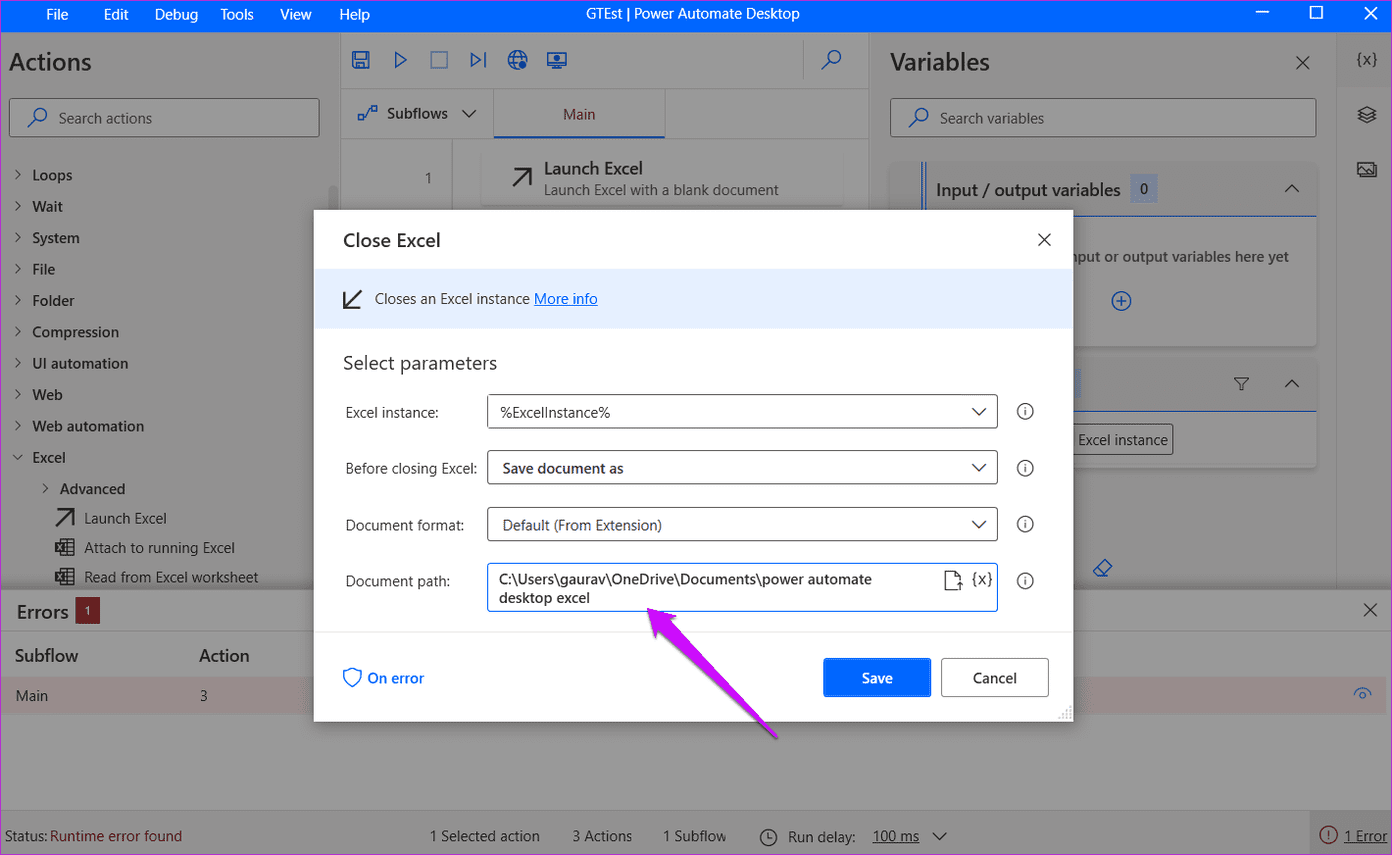
Step 9: You have to be specific. We asked Power Automate Desktop to save the Excel file but failed to choose a path and file name. Once we fixed that, everything worked, as it should have.
Users can create complicated and long workflows involving multiple apps and actions and test them to ensure that the workflow is not broken. Though the UI is easy to navigate, creating longer workflows in Power Automate Desktop may take some time. We expect experts and other users to share their workflows on social media channels soon to benefit others.
Who Should Get It
Everyone should get it. Windows users can automate several tasks now. Extract images from PDF files, copy/delete/move files once work is finished, use conditions, open a set of webpages automatically when a trigger is confirmed, and so on.
You need to be creative and find ways to make it work for you. There are also options like running javascript, querying databases, encryption with AES, FTP, and Azure. Microsoft will add more services in the future as the product grows and gains steam.
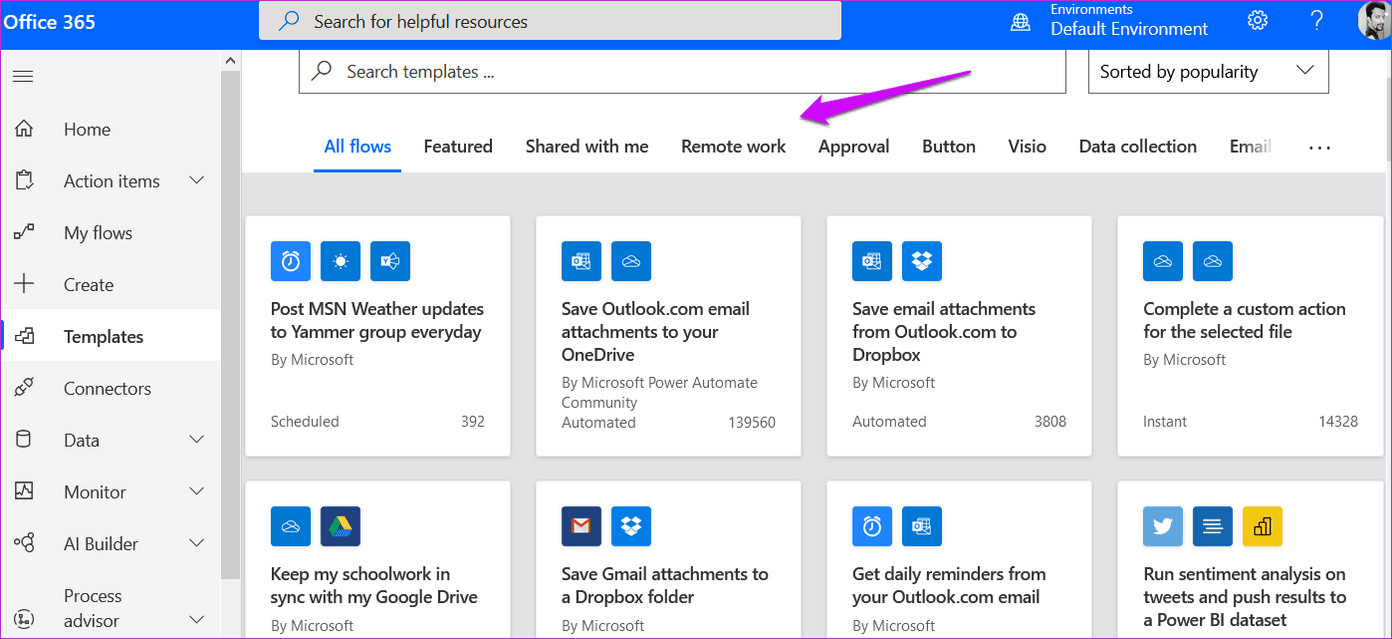
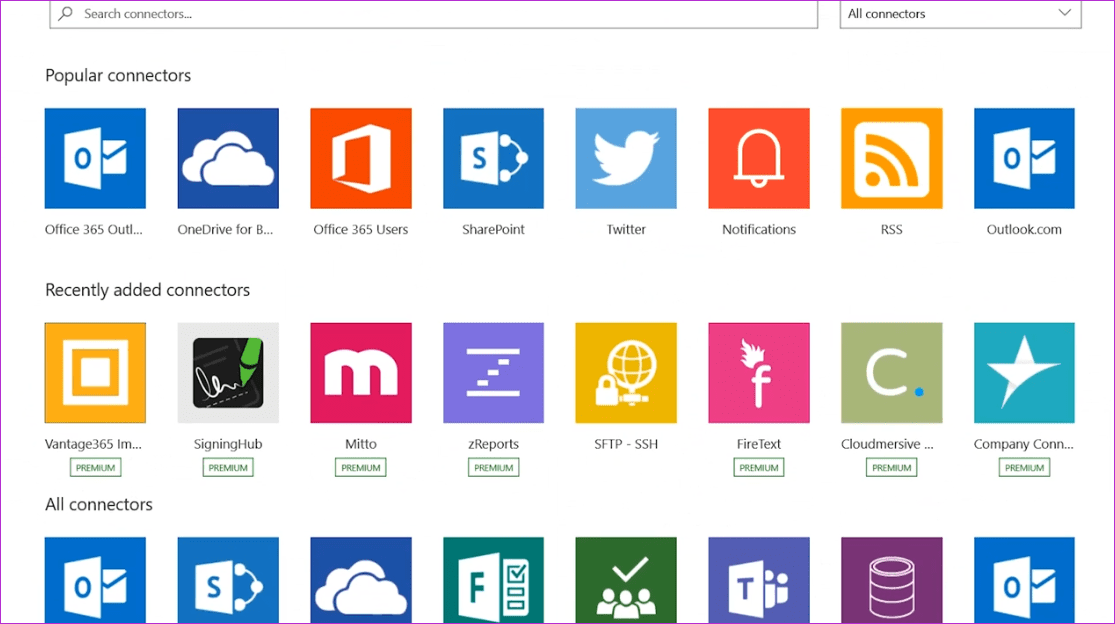
Microsoft already has a growing library of prebuilt templates and connectors that you can use to jumpstart things on their site. Just sign in to quickly find one. If it is not perfect, maybe you can edit it?
Automate or Delegate
What you can’t automate, you should try and delegate. The idea is to make time in your daily schedule for essential problems that need your expertise. A lot of folks are busy all day without actually achieving something. They are wasting their time and talents instead of being productive and contributing in a more meaningful way. This is a step in the right direction. Automation is the future, be it software, robots, or AI. So, what’s your favorite Power Automate Desktop workflow recipe? Share with us in the comments section below.
Next up: Here’s a look at how you can automate meetings on your Android Calendar using the Kono app. It’s easy and effective, read on to know more.
Was this helpful?
Last updated on 13 July, 2021
The article above may contain affiliate links which help support Guiding Tech. The content remains unbiased and authentic and will never affect our editorial integrity.

