Method 1: Uninstall Programs Using the File Explorer
Step 1: Firstly, open the Start Menu, type the name of the program you want to uninstall in the search bar, and choose Open file location from the right pane.
Step 2: Right-click on the program icon and select Open file location one final time.

Step 3: Finally, locate the uninstall execution file, right-click on it, and select Open to initiate the uninstallation process.

That’s it. The selected program will be removed from your Windows 11 machine. If you can’t locate the uninstall.exe file, the next method may help you.
Also Read: What happens when you uninstall graphics drivers on Windows
Method 2: Uninstall Programs Using the Start Menu
Step 1: Firstly, press the Windows key to open the Start Menu.
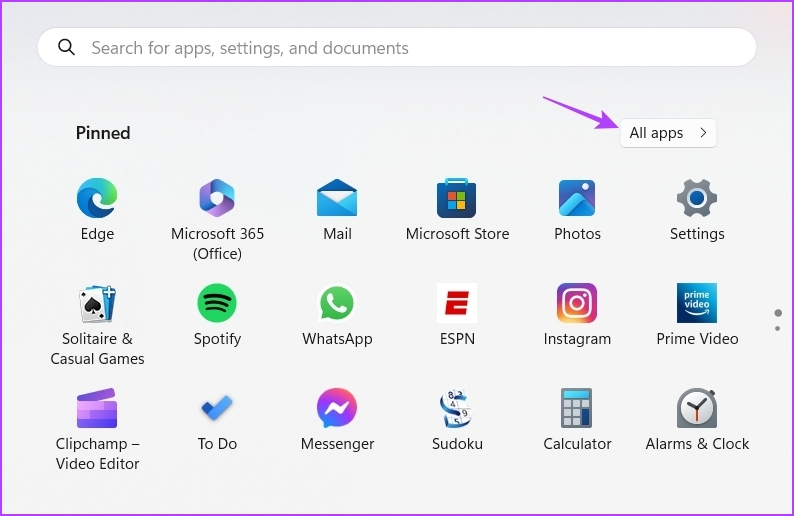
Step 2: In the Start Menu, click the All apps option at the top right corner.
Step 3: Locate and right-click on the program you want to uninstall. Then, choose Uninstall from the context menu.
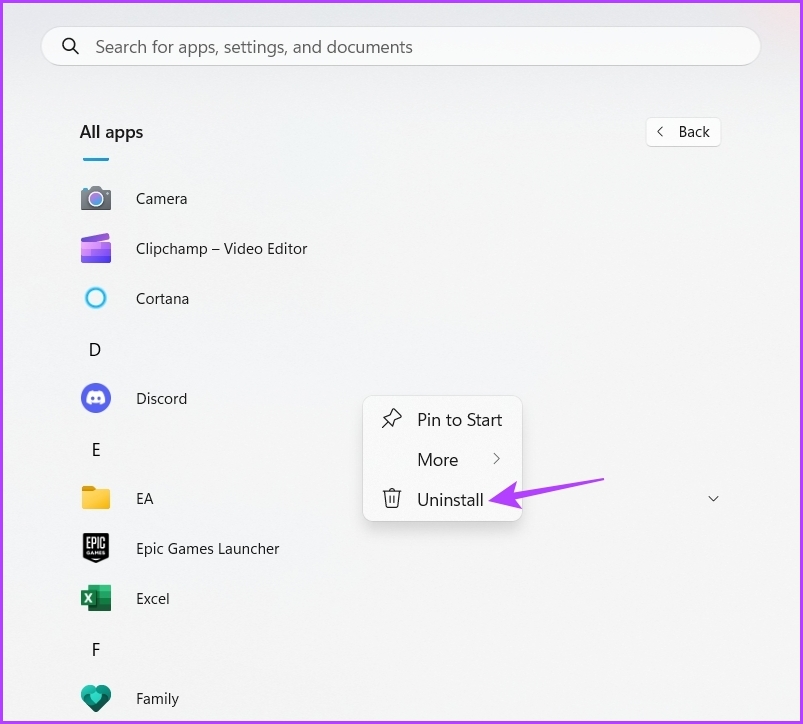
From here, follow the on-screen instructions to remove the program from the Windows 11 PC. If this method doesn’t help, try the next one.
Method 3: Uninstall Programs Using the Settings App
Step 1: Firstly, press the Windows + I keys to open the Settings app.
Step 2: In the Settings app, choose Apps from the left sidebar.

Step 3: Select Installed apps from the right pane.

Step 4: Click on the three horizontal dots next to the app you want to uninstall > choose Uninstall.

Next, follow the on-screen instructions to complete the uninstallation process.
Method 4: Uninstall Programs Using Control Panel
Note: It is important to note that you can use the Control Panel only to uninstall third-party applications.
Step 1: Press the Windows key on your keyboard. Then, type Control Panel and choose Open.
Step 2: Choose Category in the View by option.

Step 3: Click on Uninstall a program.

Step 4: Finally, right-click on the app you want to uninstall > choose Uninstall.

The application will be removed from your PC, or you may be asked to follow on-screen instructions to remove it completely.
Also Read: Top ways to fix can’t uninstall Epic Games launcher from Windows
Method 5: Uninstall Programs Using CMD or PowerShell
Step 1: Open the Start Menu, type Command Prompt in the search bar, and choose Run as administrator from the right pane.
Step 2: In the Command Prompt window, type wmic and press Enter.

Step 3: Type the below command and press Enter.
product get name

Step 4: Now, type the following command and press Enter.
Note: Ensure to replace “app name” with the name of the app you want to uninstall, which you can find in the list of software listed.
product where name="app name" call uninstall
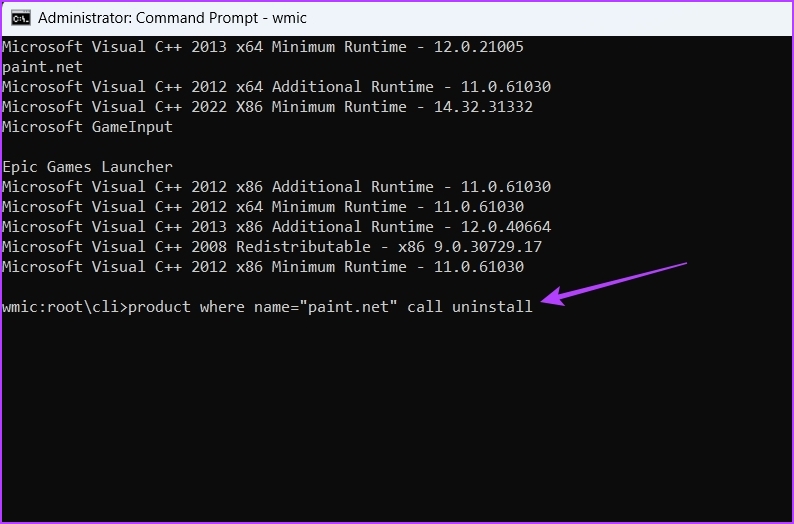
Step 5: Type Y and press Enter to confirm your selection.
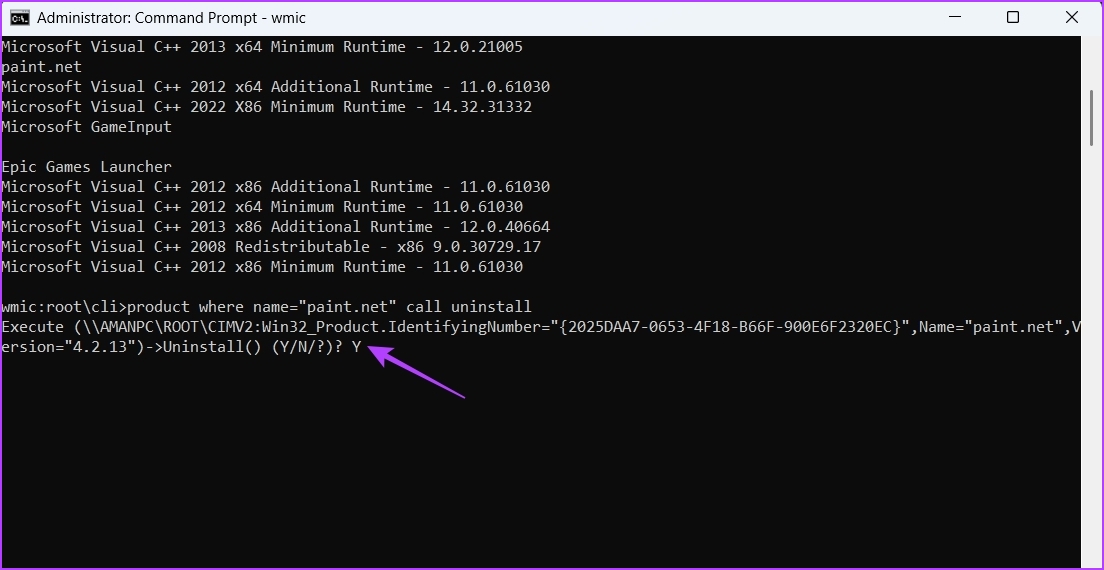
The application will be removed immediately. However, if you want to uninstall a program using Windows PowerShell, follow the below instructions:
Step 1: Open the Start Menu, type Windows PowerShell in the search bar, and select Run as administrator from the right pane.
Step 2: Type the following command in the PowerShell window. It’ll display all the installed applications.
Get-AppxPackage
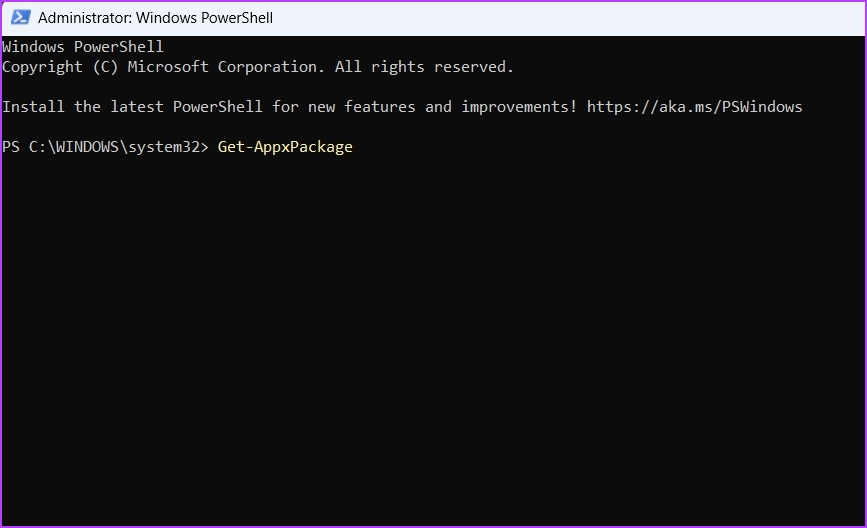
Locate and note down the full name of the app you want to uninstall.
Step 3: Now, type the following command and press Enter.
Note: Ensure you replace ‘app name’ in the command with the full name of the app you want to uninstall.
Remove-AppxPackage <app name>
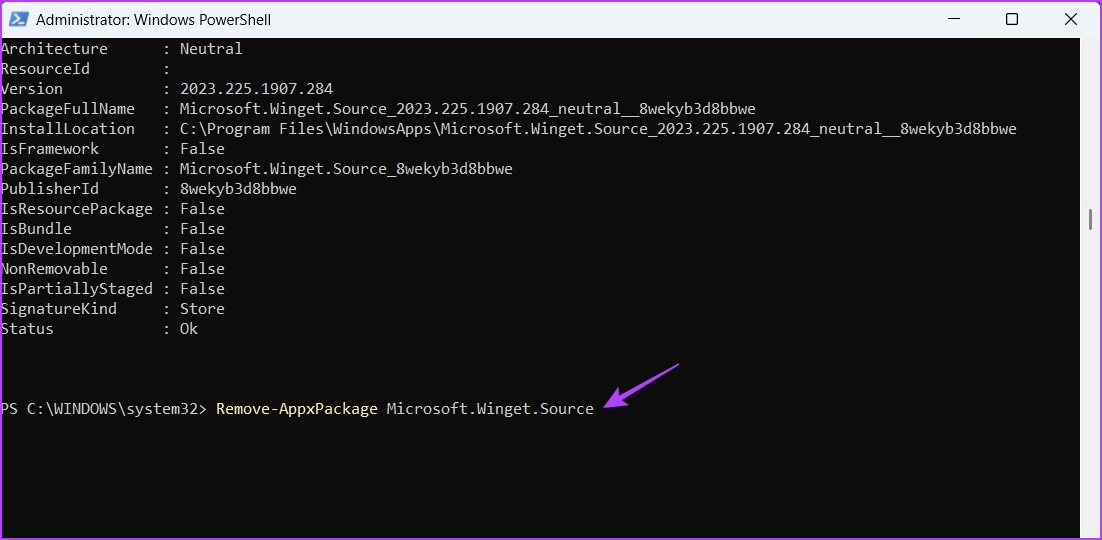
The selected application will be successfully removed.
If you don’t want the hassle of finding the file location or following multiple steps to uninstall programs on Windows 11 that cannot be uninstalled, move on to the following method.
Method 6: Uninstall in Safe Mode
Step 1: Press the Windows + R shortcut to open the Run dialog box. Then, type msconfig and click OK.
Step 2: Switch to the Boot tab and check the box for Safe boot.

Step 3: Click Apply and then OK.
Step 4: Select Restart to boot your PC into Safe Mode.
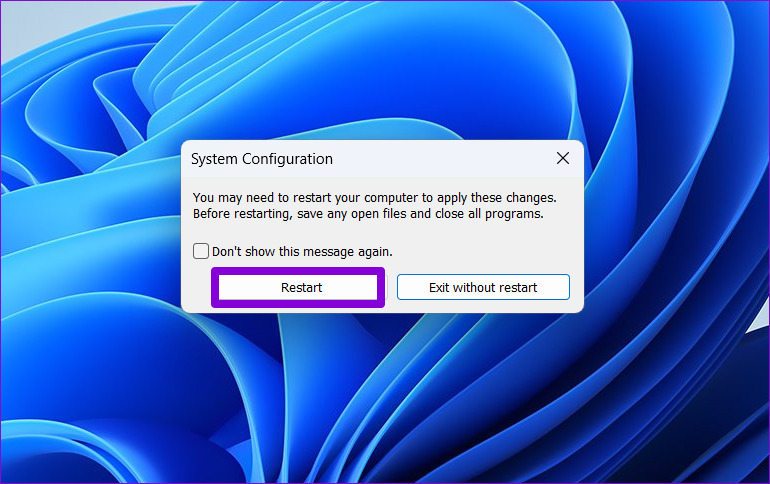
After your PC boots into Safe Mode, uninstall the program via the Settings app or Control Panel. Once removed, open the System Configuration tool again, uncheck the Safe boot option, and restart your PC to exit Safe Mode.
Method 7: Uninstall Apps Using Third-Party Apps
For this demonstration, we are using IObit Uninstaller, a popular and trusted option. Follow the below steps.
Step 1: Firstly, go to IObit Uninstaller from your preferred browser > click on Free Download.
Step 2: Once downloaded, run the installer and follow the on-screen instructions. You will be greeted with a list of all the programs installed on your Windows 11 PC.
Step 3: Now, scroll through the apps and click on the trashcan icon next to the app you want to uninstall.

Step 4: In the confirmation pop-up, click Uninstall.
Note: You can also check the box next to Automatically remove residual files to remove the app from your machine completely.
Depending on the program’s size, IObit Uninstaller will take some time to remove the app from your PC.
FAQs
Unfortunately, Windows 11 doesn’t provide a built-in feature to uninstall multiple programs simultaneously. You must uninstall them one by one. However, if you use any third-party tools, you can uninstall programs in bulk from your Windows 11 PC.
After uninstalling programs, you can use the built-in Disk Cleanup tool or Storage Settings to free up space by removing temporary files and other unnecessary data.
Also Read: How to completely uninstall McAfee on Windows.
Was this helpful?
Last updated on 08 July, 2024
The article above may contain affiliate links which help support Guiding Tech. The content remains unbiased and authentic and will never affect our editorial integrity.

